Our laundry/mud room was the first room that we ever completely gutted when we moved into our home. It was also the first room I ever completely designed from scratch. Over the years, and 2 more kids later, we realized we needed it to function a bit differently for us. So we decided to give it another update. This time using our more seasoned DIY skills and design knowledge to create a space that is full of form and function. Including DIY Built ins and hidden shoe storage.
THE BEFORES
Let’s take a walk down memory lane and look at where we first started when we moved in. It was pretty bad, but Dan’s dad was living here all by himself and really didn’t care what it looked like.
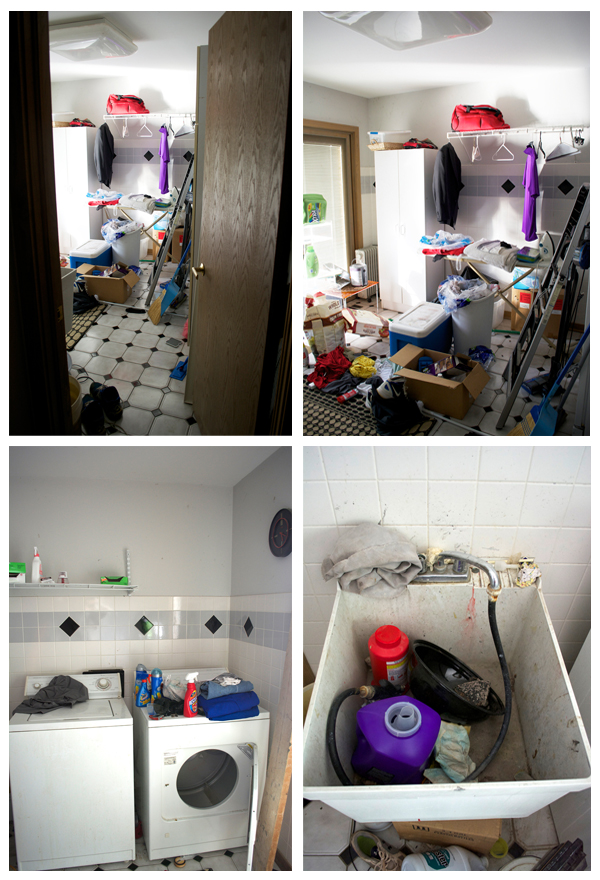
That’s why this was the first room we tackled when we moved in since he had no emotional attachment to it…unlike some other rooms in the house 😉
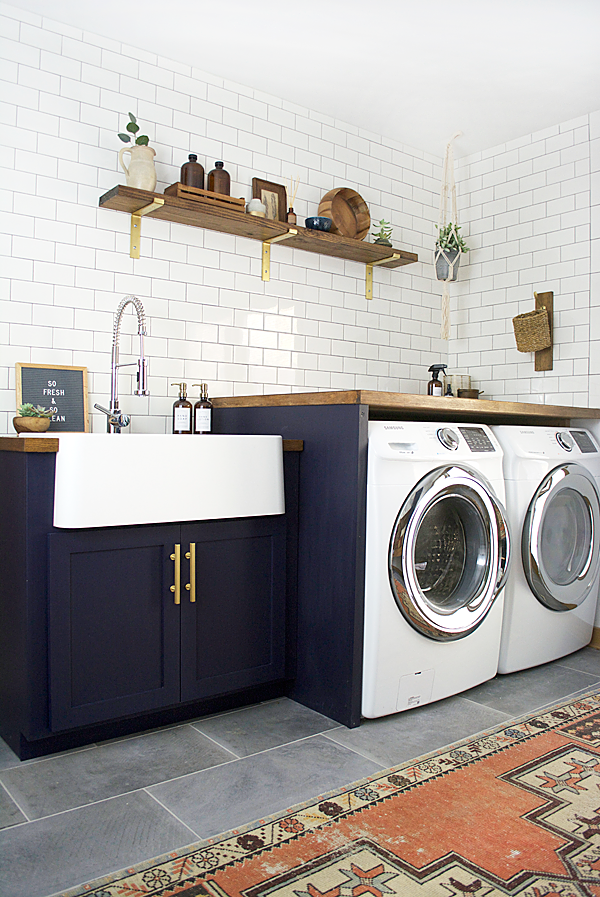
This was how it looked after we completed it for the One Room Challenge back in 2016.
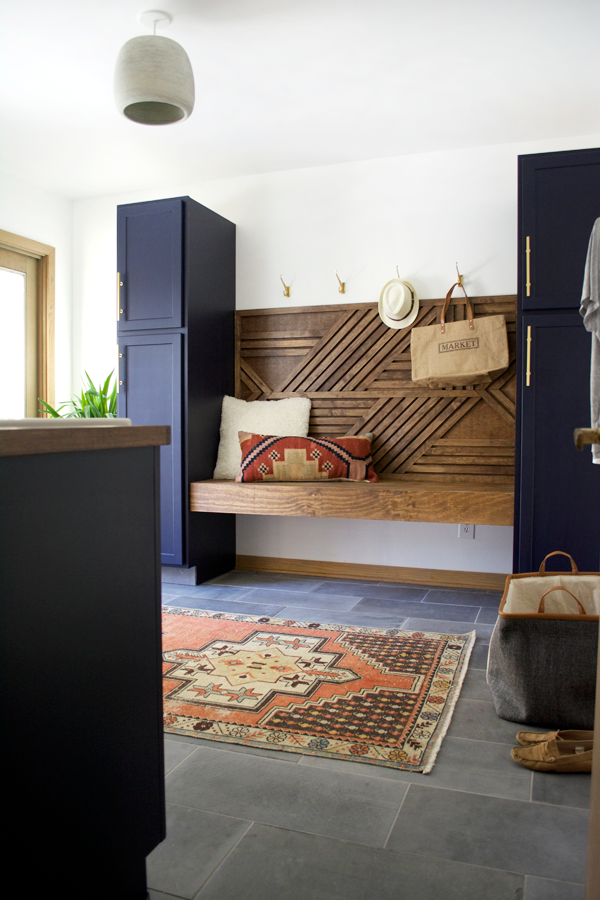
Over the years, I’ve changed the decor a bit and gave it a little refresh, but the main bones have always stayed the same.
Now that we have 3 kids, we realized this space wasn’t getting used to it’s maximum potential. Our shoe storage was completely lacking and a hot mess – I knew I wanted some hidden shoe storage. The kids couldn’t really reach the hooks to hang any of their stuff and my style has evolved and I was just ready for a change.
THE WALLS: SHIPLAP PANELING
One of the easiest ways to add visual interest and character to your walls is by hanging shiplap. If you buy singular boards though, it can get pricey real quick. We used these shiplap panels from Lowe’s which were much cheaper but still give you the same look. You just have to cut them to size on the table saw where needed.
We hung this on every wall that was just drywall, including behind the bench and it really helped the room feel more cohesive.
THE COLOR: MOUSES BACK BY FARROW & BALL
For years I’ve thought about changing the color of the cabinets in here but never took the plunge. So when we finally decided to do this update it was go time. I sampled a few colors from Farrow & Ball and ended up choosing Mouses Back which is the most beautiful light brown, beige color. Don’t let the funny name throw you off, it’s absolutely stunning!

We used their new Dead Flat finish which is exactly what it sounds like: very flat. And I usually wouldn’t choose a flat finish for such a high traffic area but this paint was meant for exactly that. It’s durable, scrubbable and scratch resistant so I felt confident putting it somewhere I knew grubby little hands would be constantly touching.
It’s also multi-surface which is great because it can be painted on walls, woodwork and metal. No need to tape off – just paint it all!
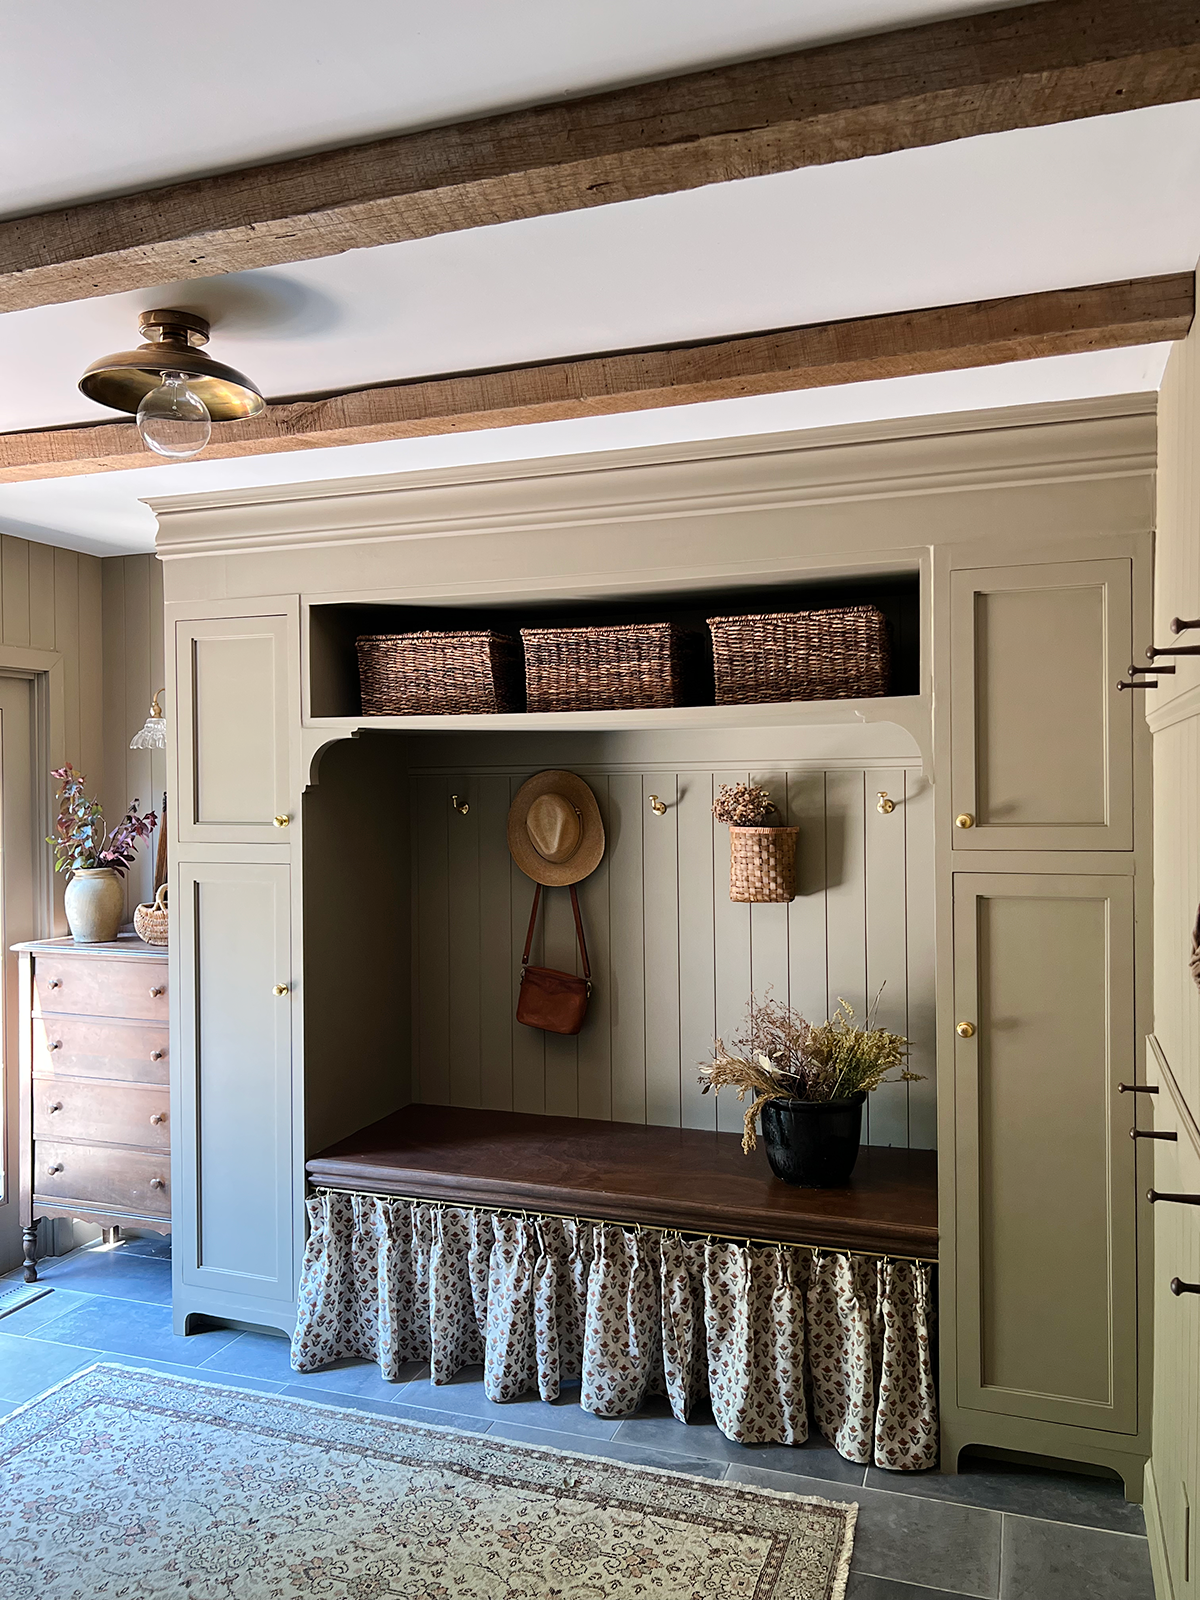
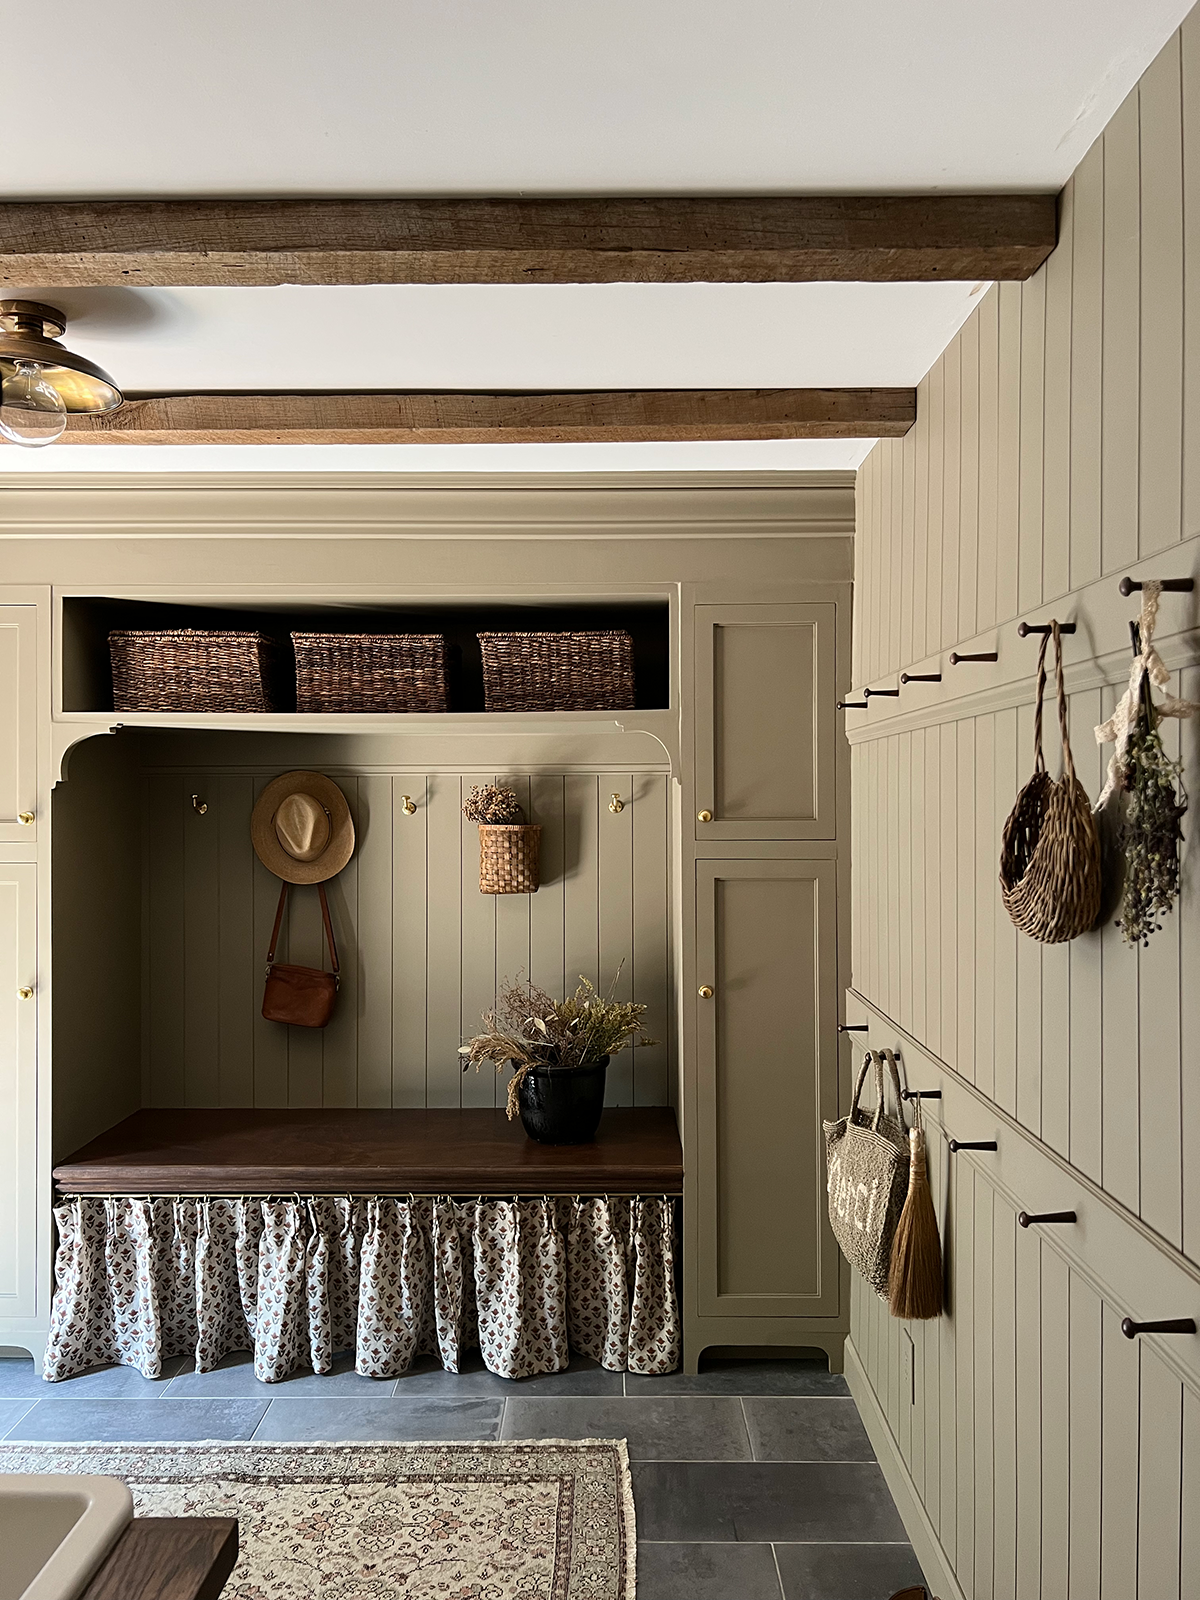
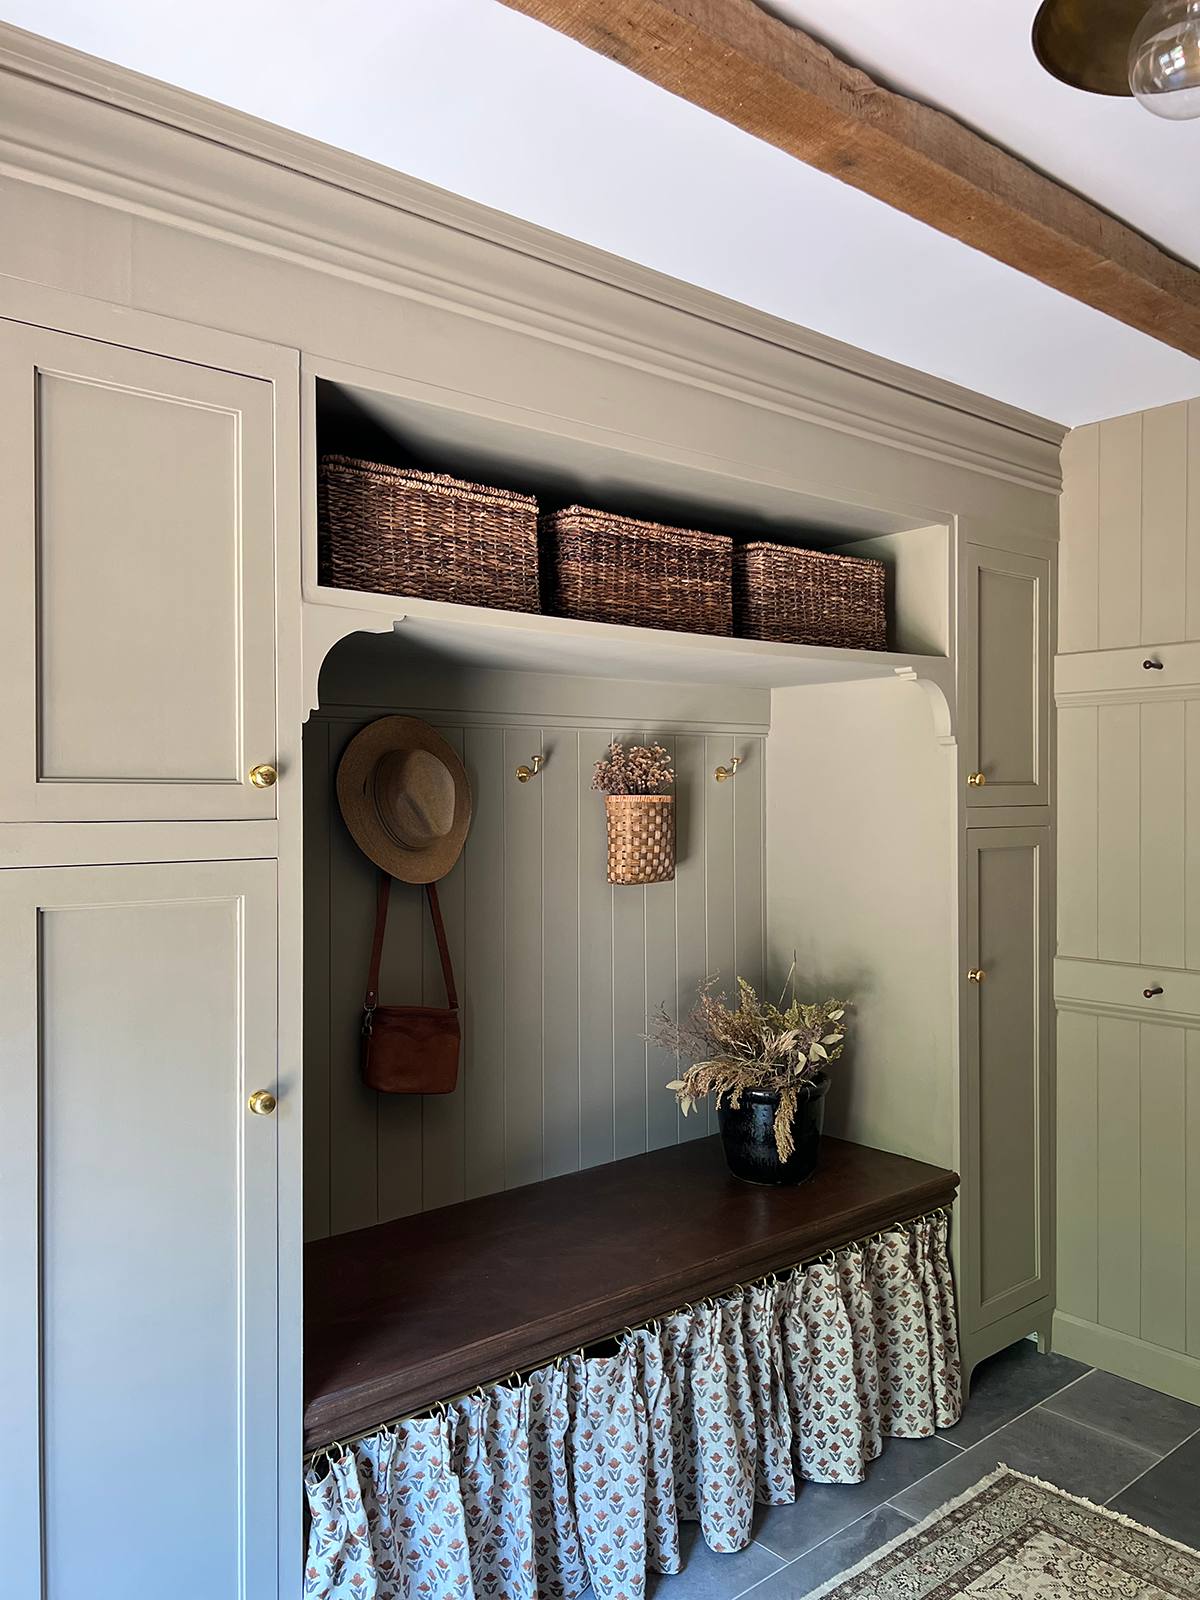
THE CABINETS: DIY BUILT INS WITH A CUSTOM LOOK
New cabinetry can be awfully expensive – which we recently learned from our kitchen reno. So we knew we wanted to be a little more budget friendly in here. I wanted the look of custom built ins so instead of ripping everything out, we just built on top of what was already there. We kept the two tall cabinets which were just stock cabinets from Lowe’s and added trim and moulding above them as well as a shelf in between to tie it all together.
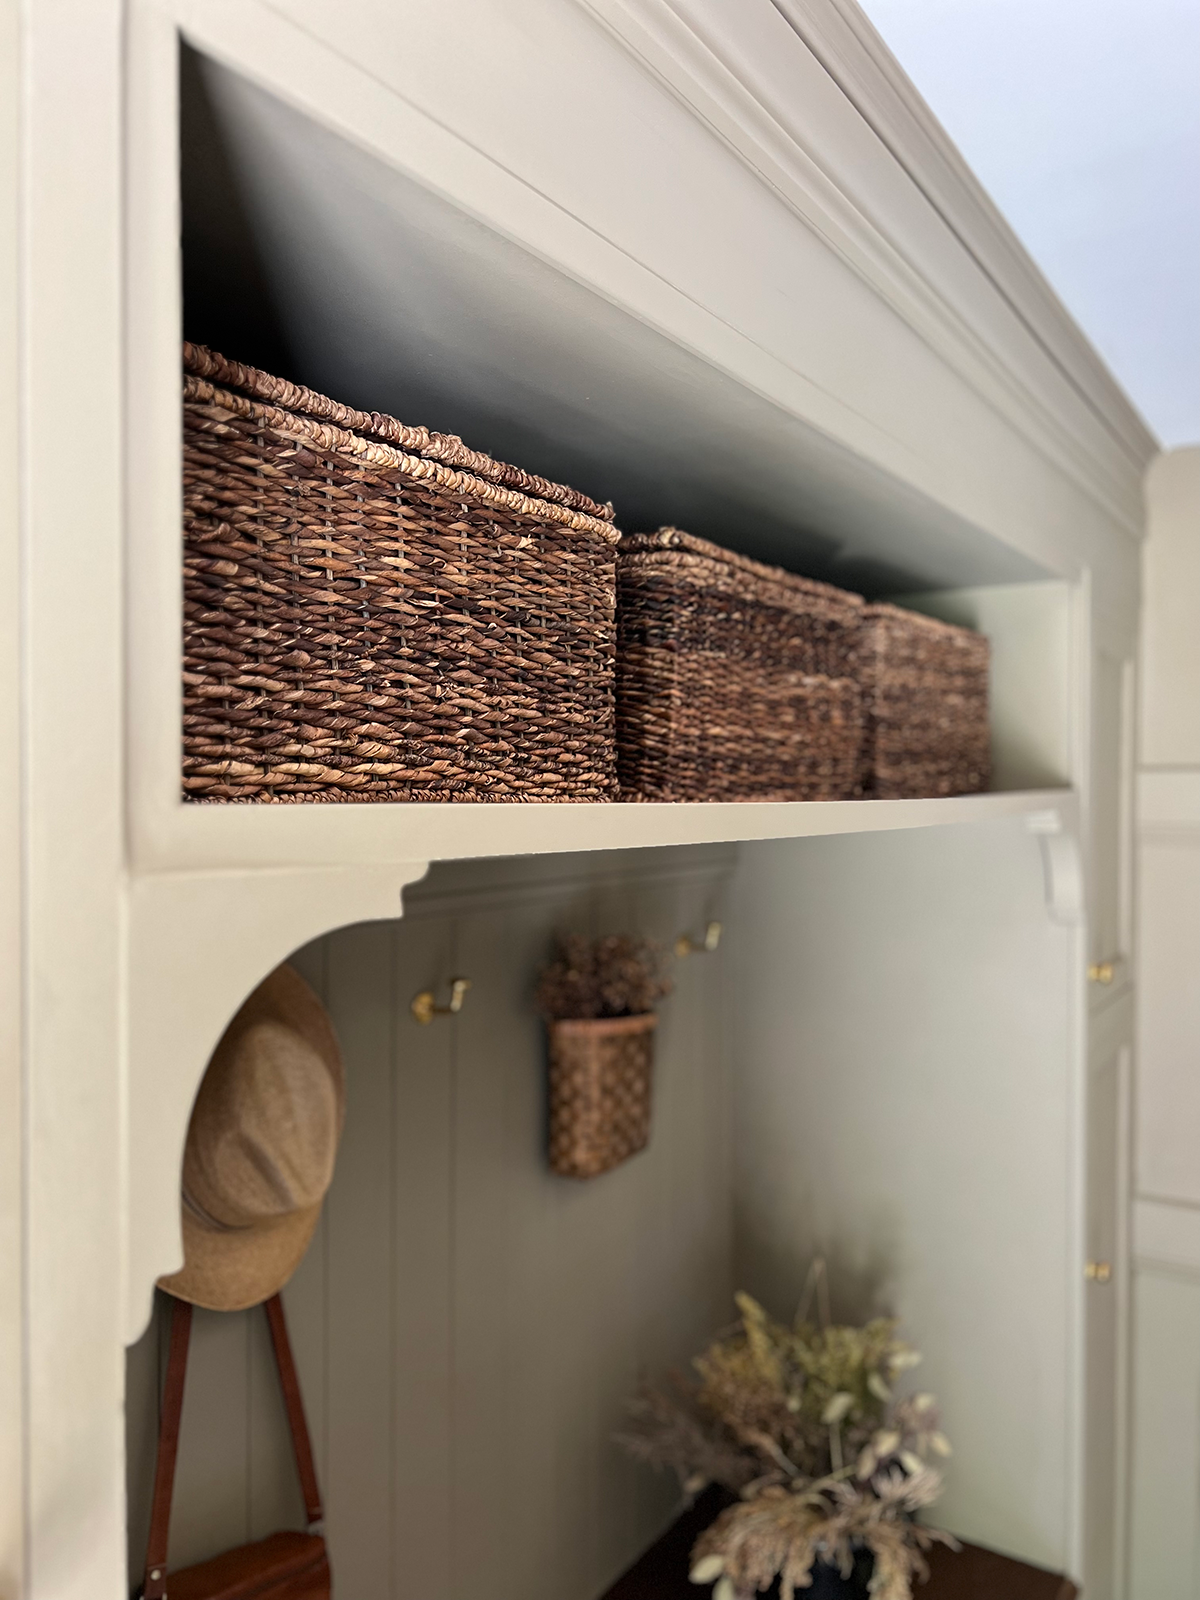
It completely transformed this side of the room and made it so much more functional with that additional storage above. And the crown moulding took it all up a notch. Making our own DIY built ins saved us a ton of money.
Another update we did was to change out the cabinet doors. They were originally overlay doors which means they rest on top of the face frame. I wanted to change them to be inset for a more European look.
We ordered them from Fast Cabinet Doors and yes they live up to their name. They arrived super fast and were really great quality. You can get them in a number of finishes but we just got them in paint grade since I was going to be painting.
I went with the Campbell Cabinet Door which has just a little more detail than your standard shaker door and I adore how they look.
Installation ended up being a little harder than we thought, only because we measured the openings for our doors before we built everything up around the cabinets. After doing so, the weight of the new wood shifted things slightly and the new doors didn’t fit perfectly.
All we needed to do was shave the sides of some of the doors as well as some parts of the inside edge of the cabinet and we eventually got them to sit inset and they looked so good! If you’re ever in this situation, a hand planer works wonders!

The other thing you can add to your DIY built ins are custom toe kicks. This is a great way to make basic builder grade cabinets look more custom. You can create any shape you want and just attach them using wood glue. Details like this are what really make a space stand out!
You can see the process of making our decorative toe kicks on instagram. My friend, Jenna, also has a great tutorial!
STORAGE
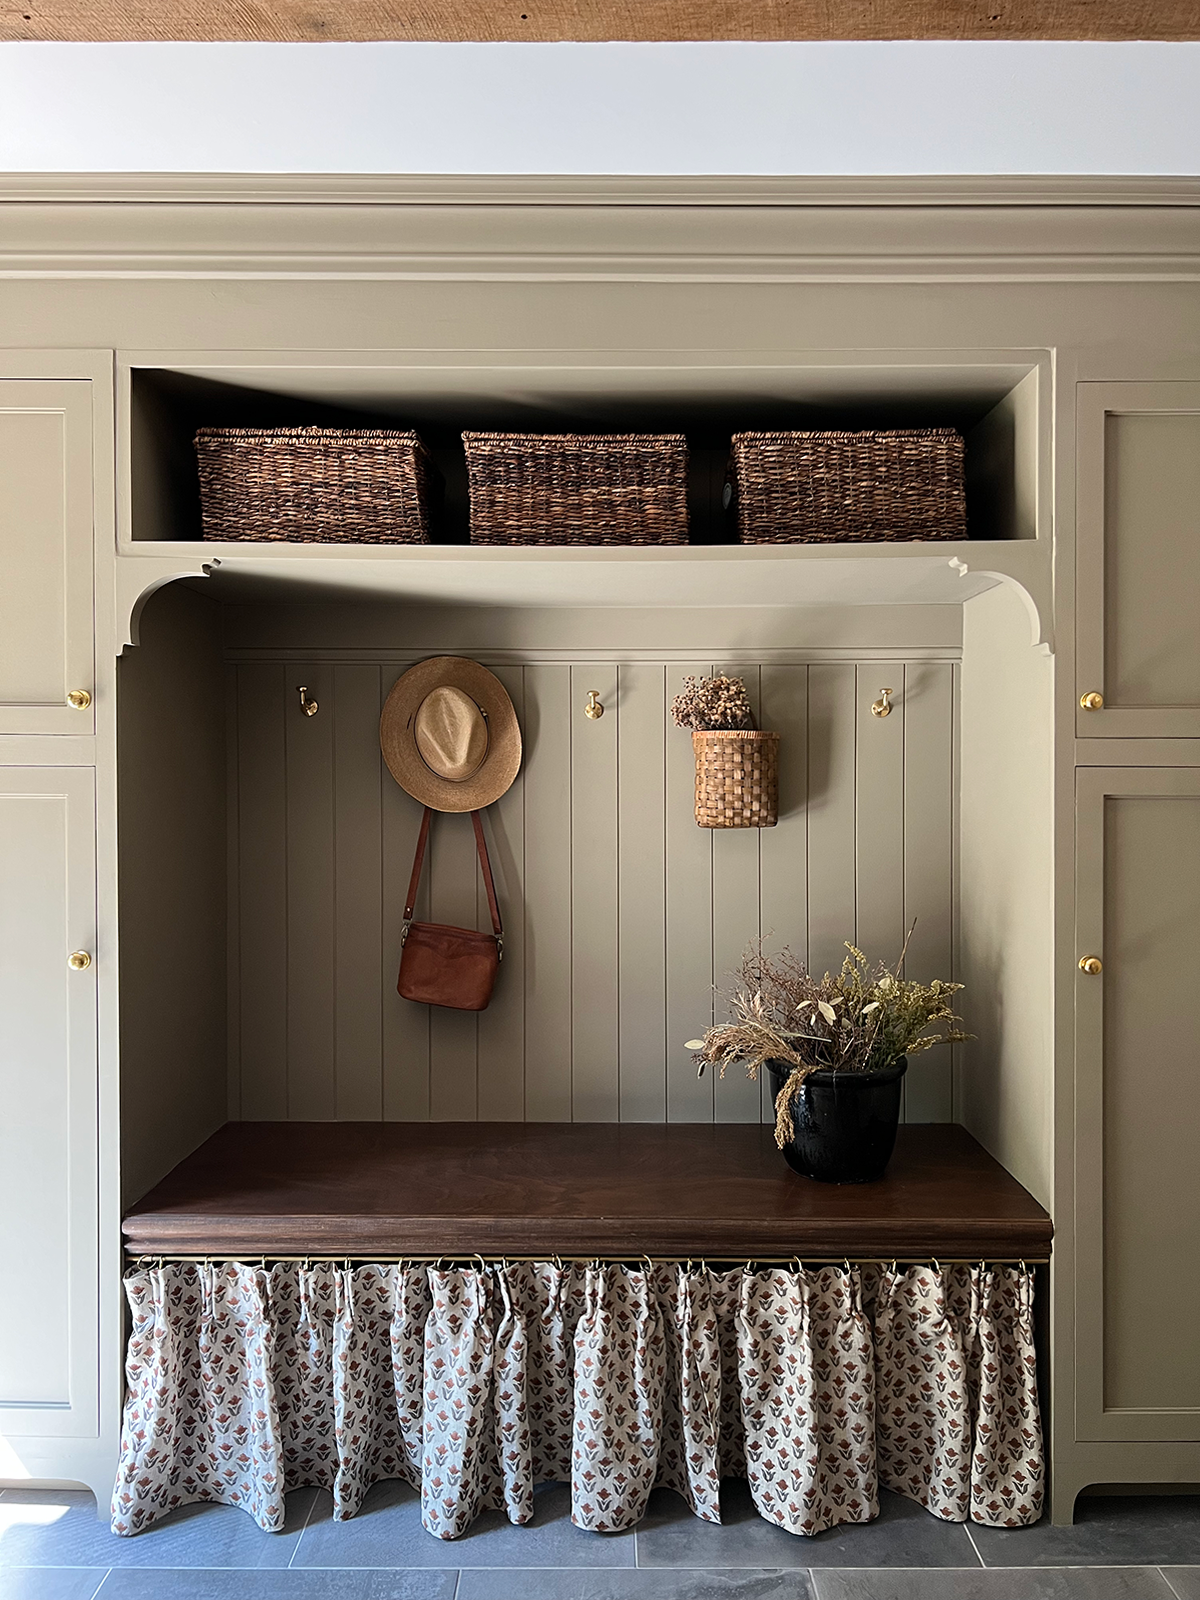
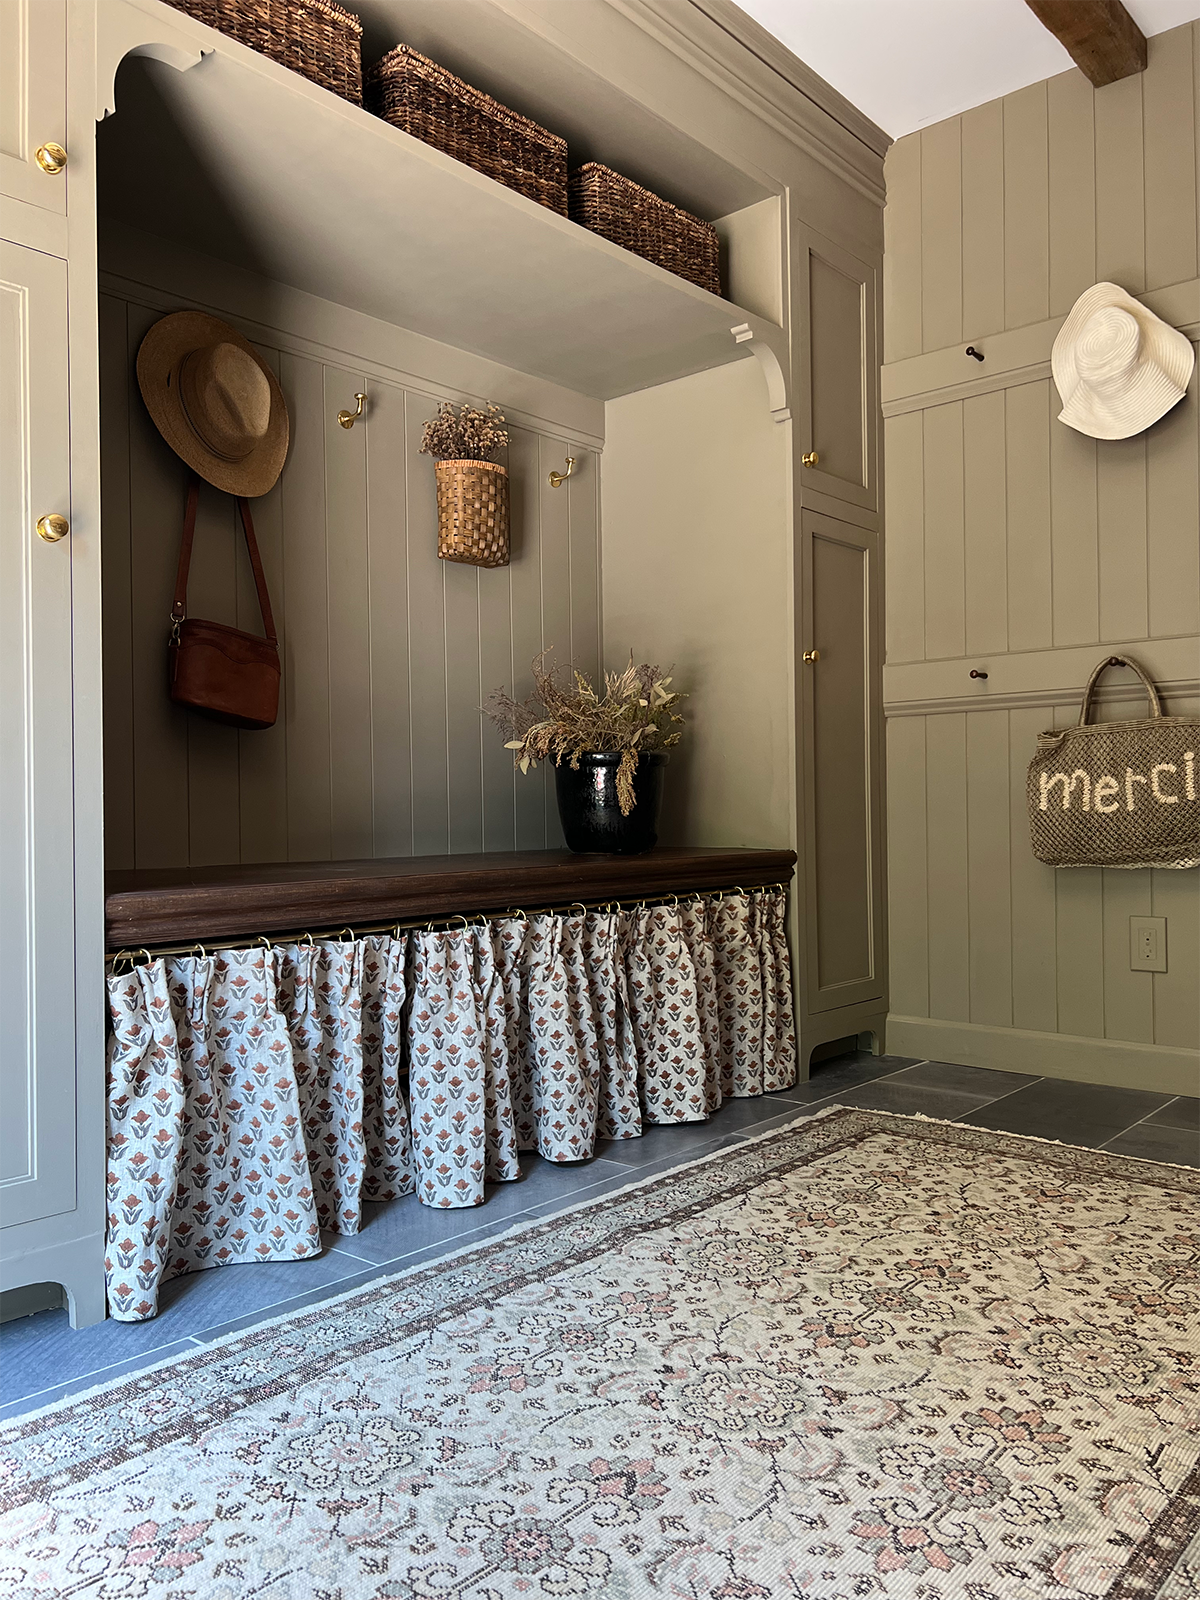
Storage was the main thing we were lacking in here and by adding the space above the bench we were able to put 3 big baskets. We’ll use these for seasonal items like boots and winter accessories and swim gear and beach towels.
The shoe situation was my least favorite part about this space before. We just chucked them all under the bench with no rhyme or reason and it always was such a mess. I knew we needed to address this in a more functional and beautiful way.
I’ve always loved the look of sink curtains and cute little cafe curtains on brass rods so I decided to make a shoe curtain! I shared my No-Sew Pinch Pleat Curtain tutorial already so you can check it out if you missed it but I’m obsessed with how it turned out!
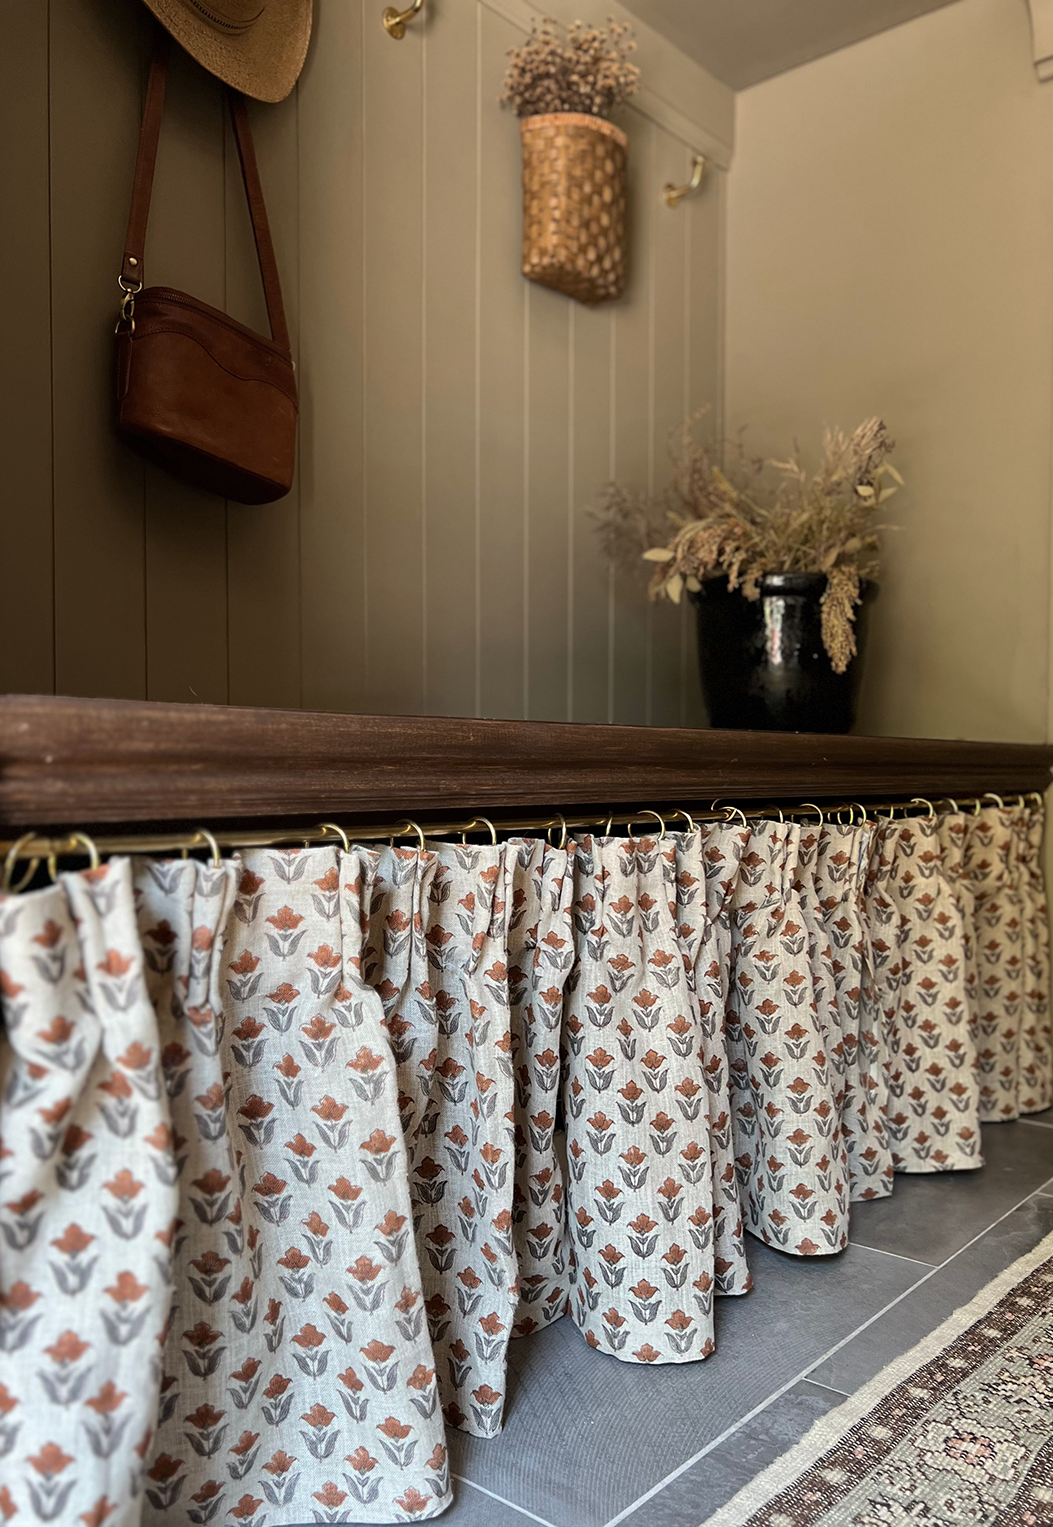
The gorgeous floral block print fabric paired with the brass rail and hooks makes my heart so happy.
I ended up creating 3 small curtains and this way there are more access points to get to our shoes. Behind the curtain I put two small shoe racks that are two tiered so it gives us plenty of room. Now even if things get a little messy, you’ll never see it 😉 It’s the perfect hidden shoe storage solution!
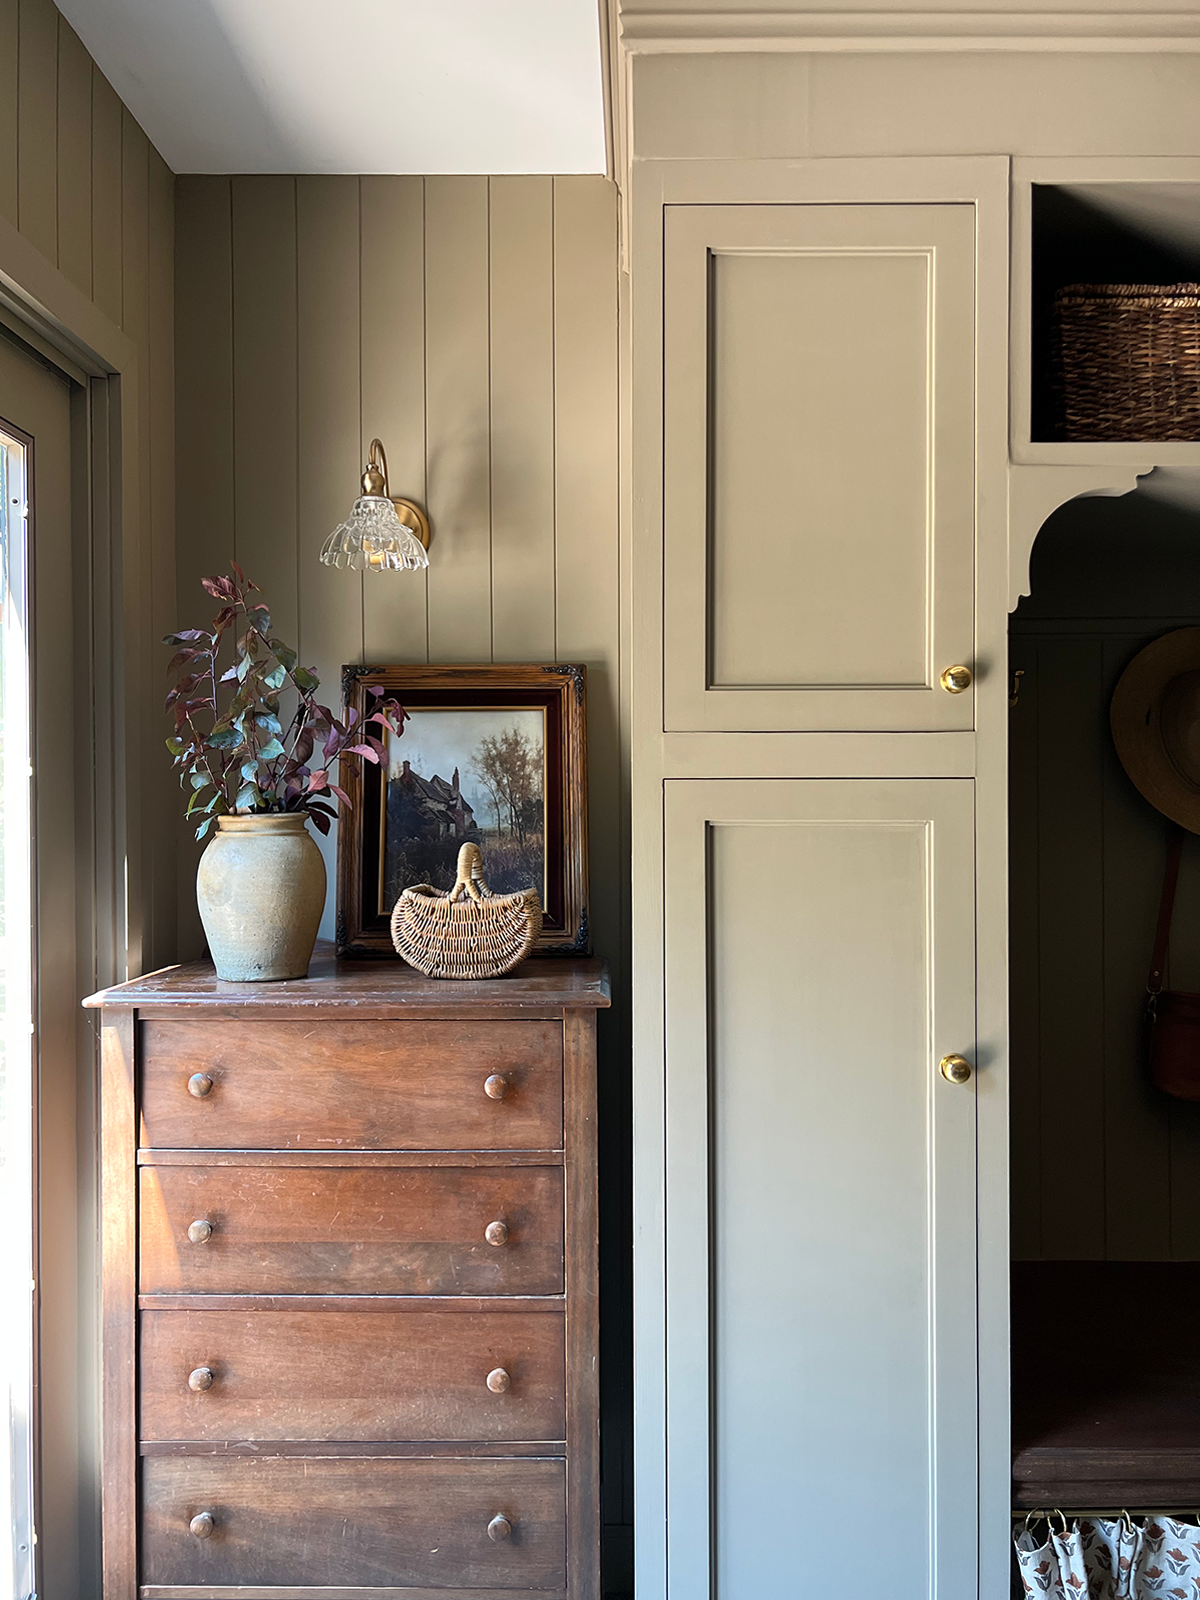
Since we have sliding glass doors in here, the cabinets can’t sit flat against the wall on the left. It created a little nook that I ended up finding the perfect little antique dresser for. It gave us another area of storage where we can put some of the kids shoes they’re not wearing every day, paper towels and any other random things we need to!
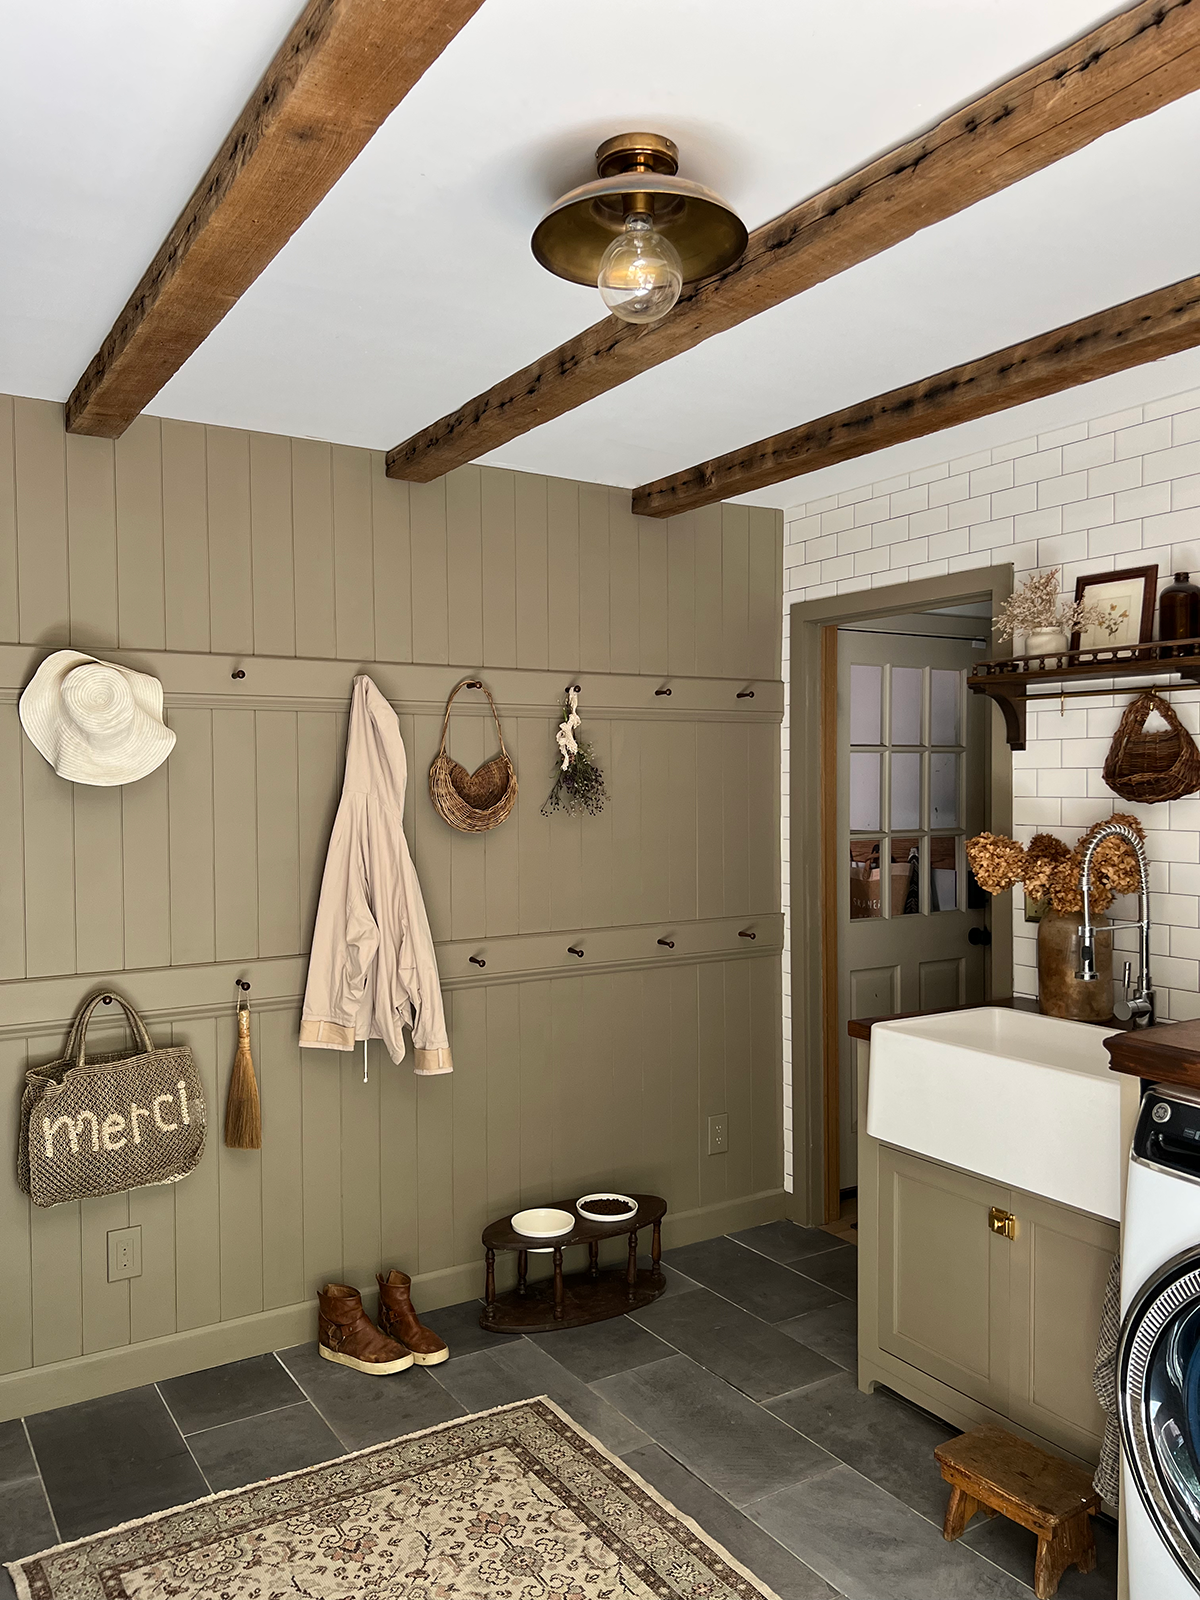
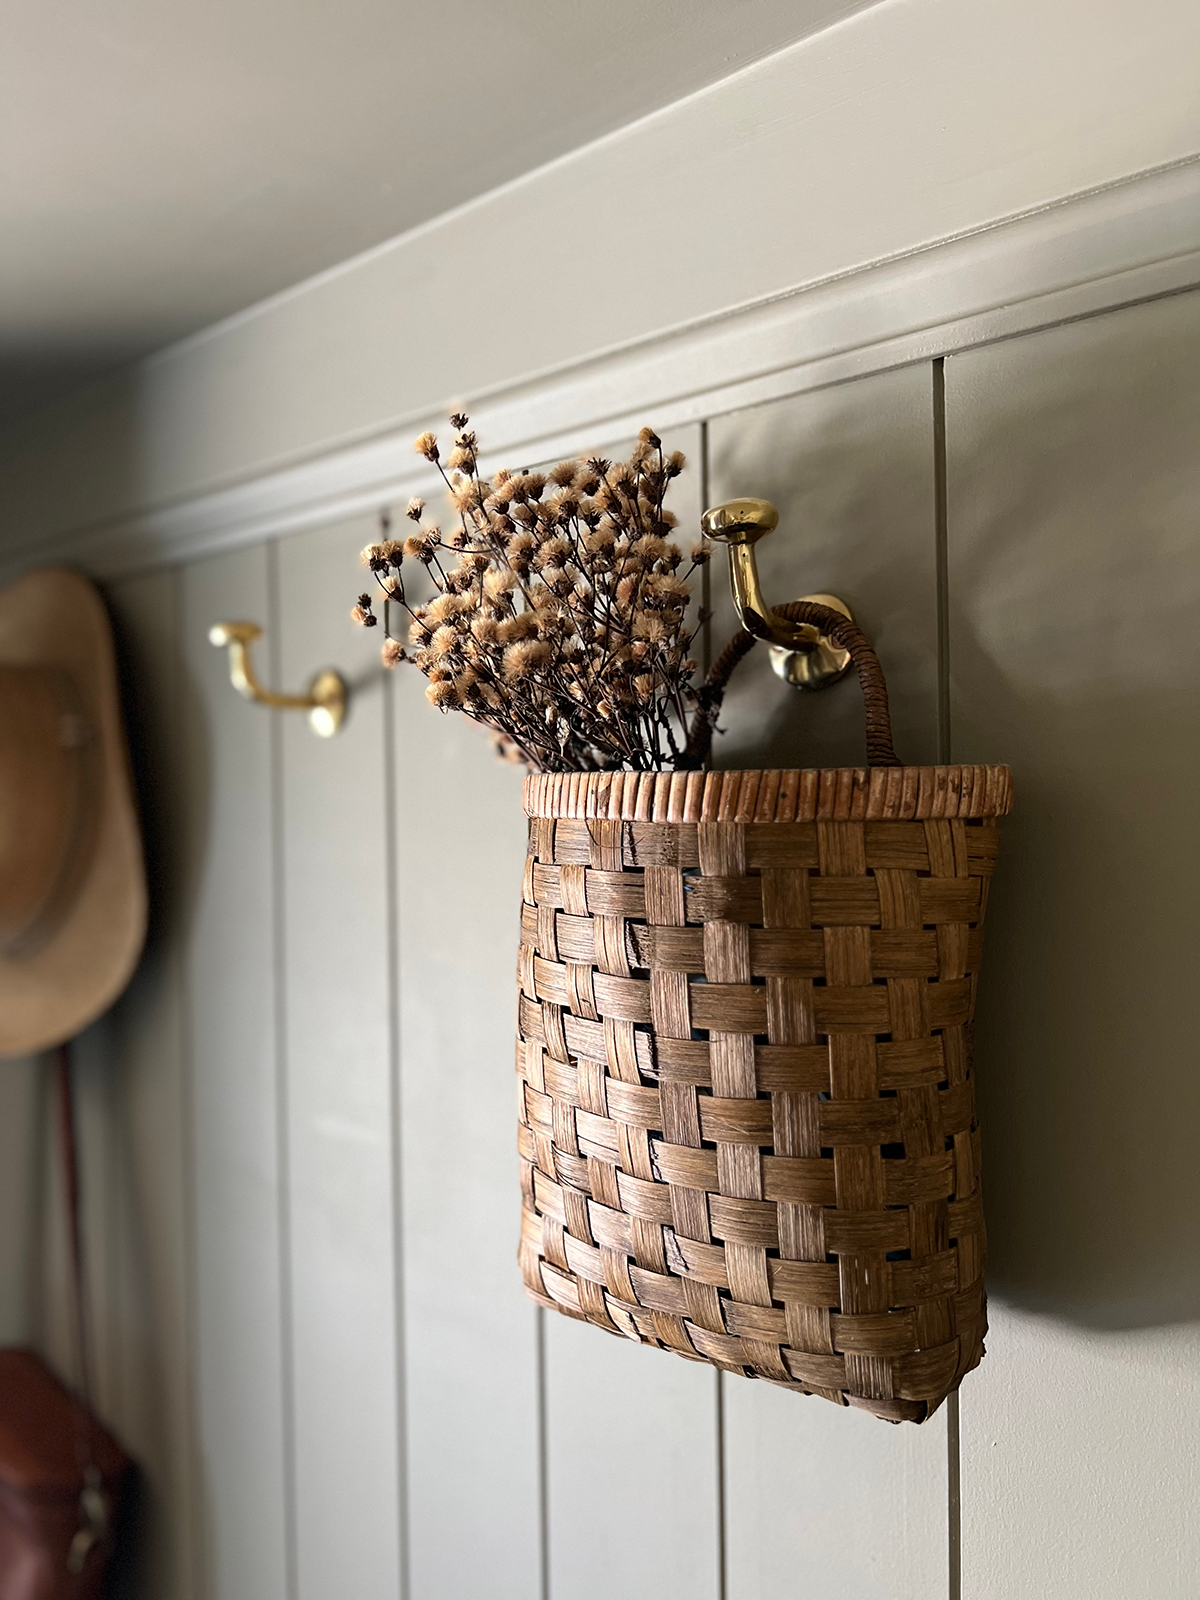
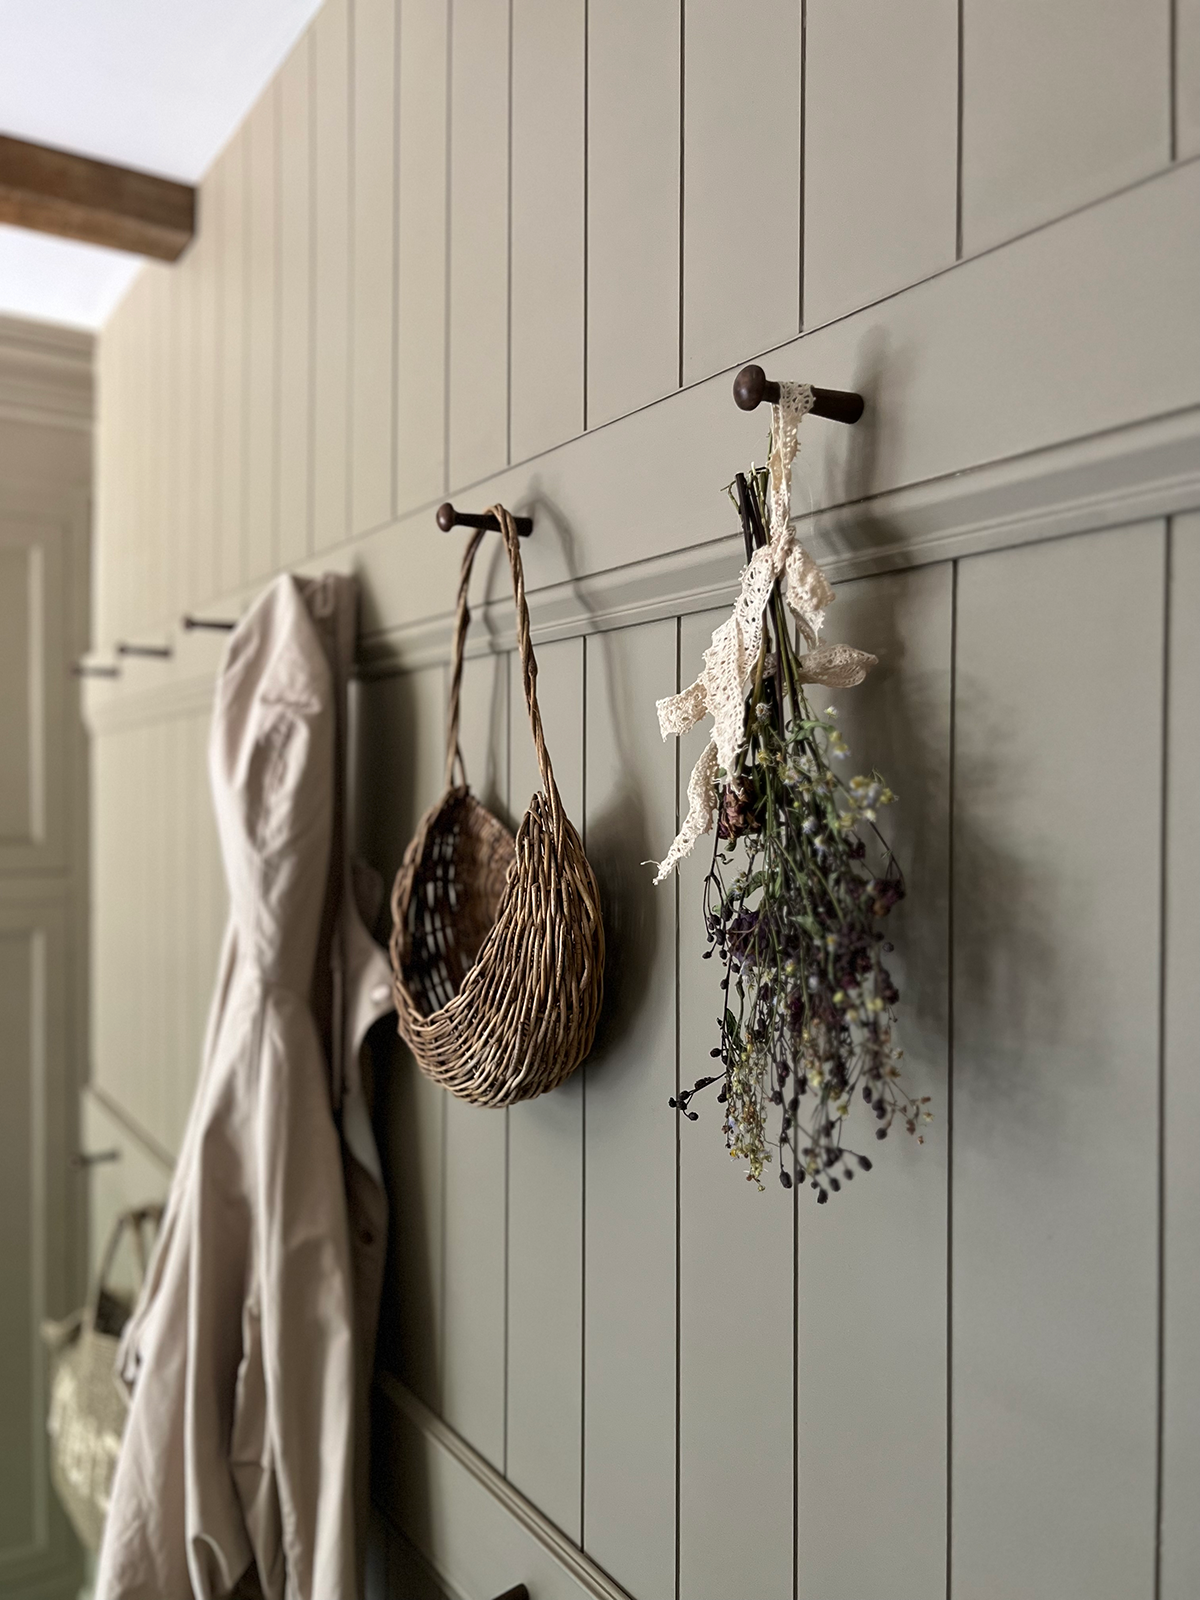
THE PEG WALL
This was another area that was not being used to its maximum potential. I had one tiny little drying rack on this wall that barely ever got used. And since the kids can’t really reach the hooks above the bench I decided to turn this into a giant peg wall.
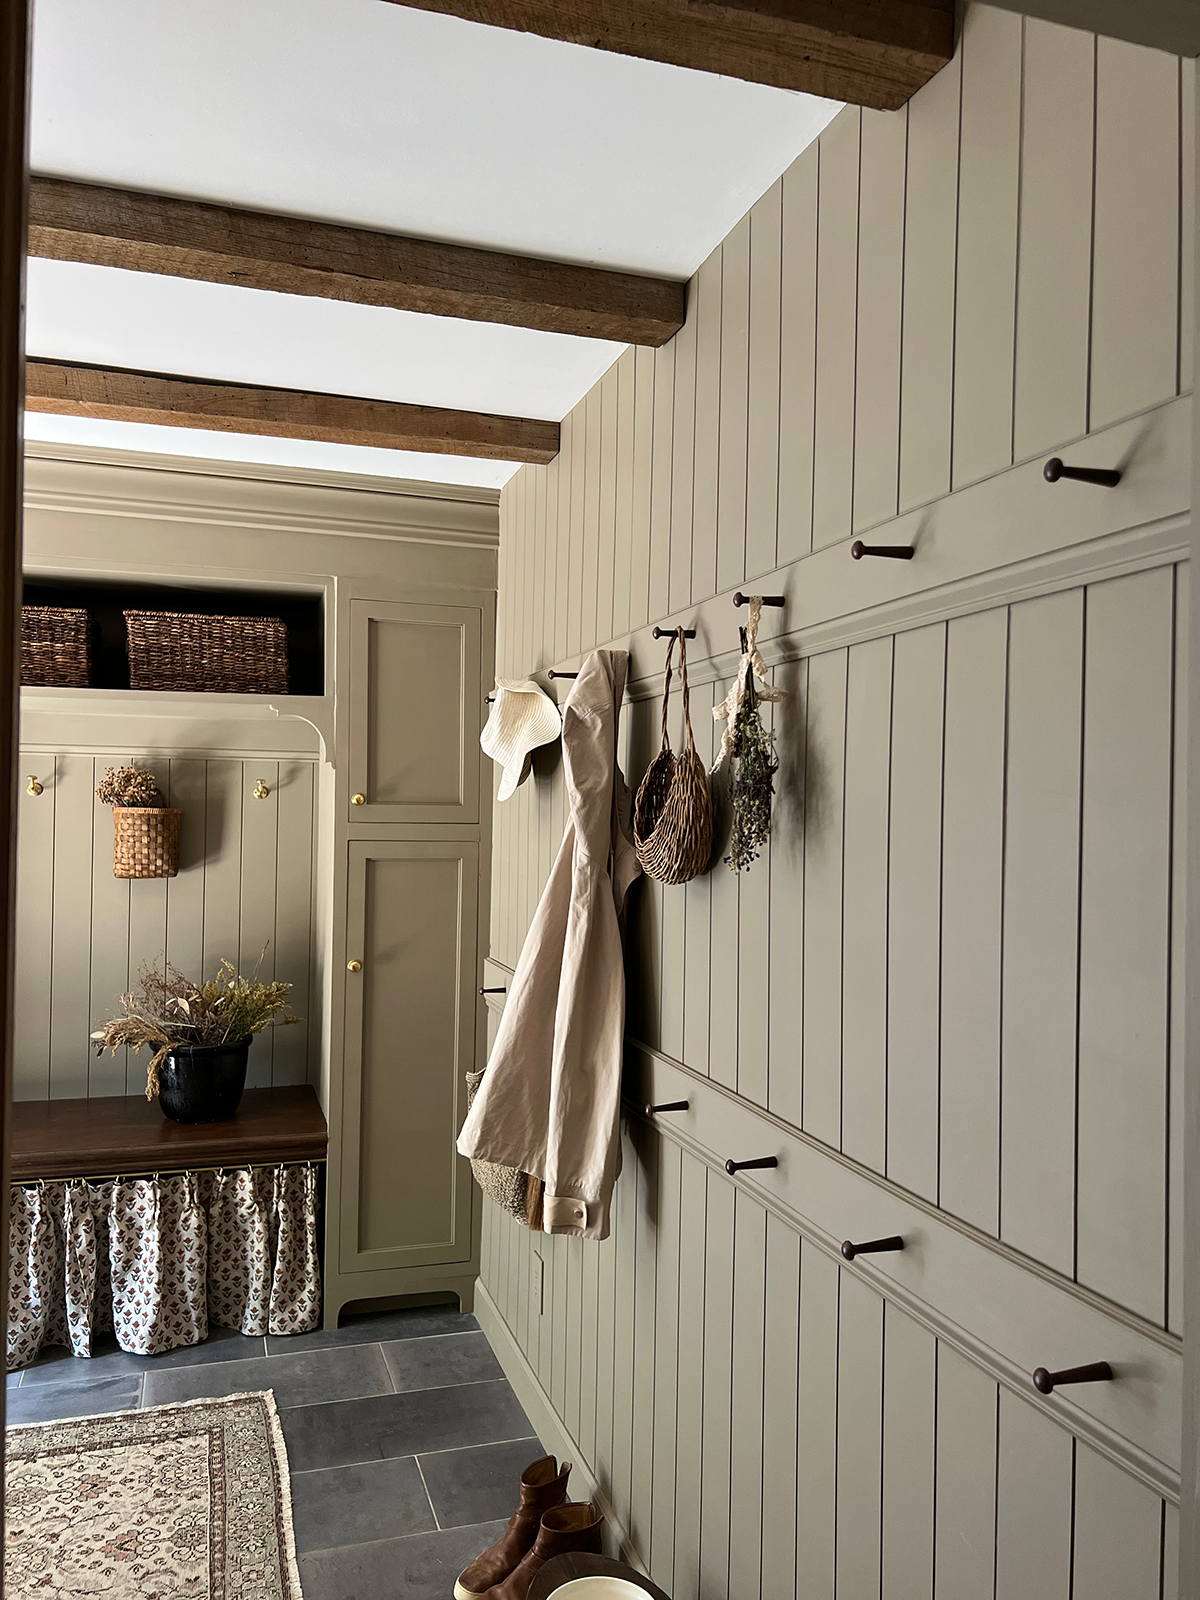
As soon as I did, I wished we had done it from the start. It created such a practical space for us! Now the kids can reach all the bottom hooks and hang up whatever they need to. We can hang clothes to dry, extra coats, purses, bags – all the things!

To add some visual interest I used pieces of baseboard to screw the pegs into and then decided to stain the pegs for some contrast against the paint.
THE LAUNDRY
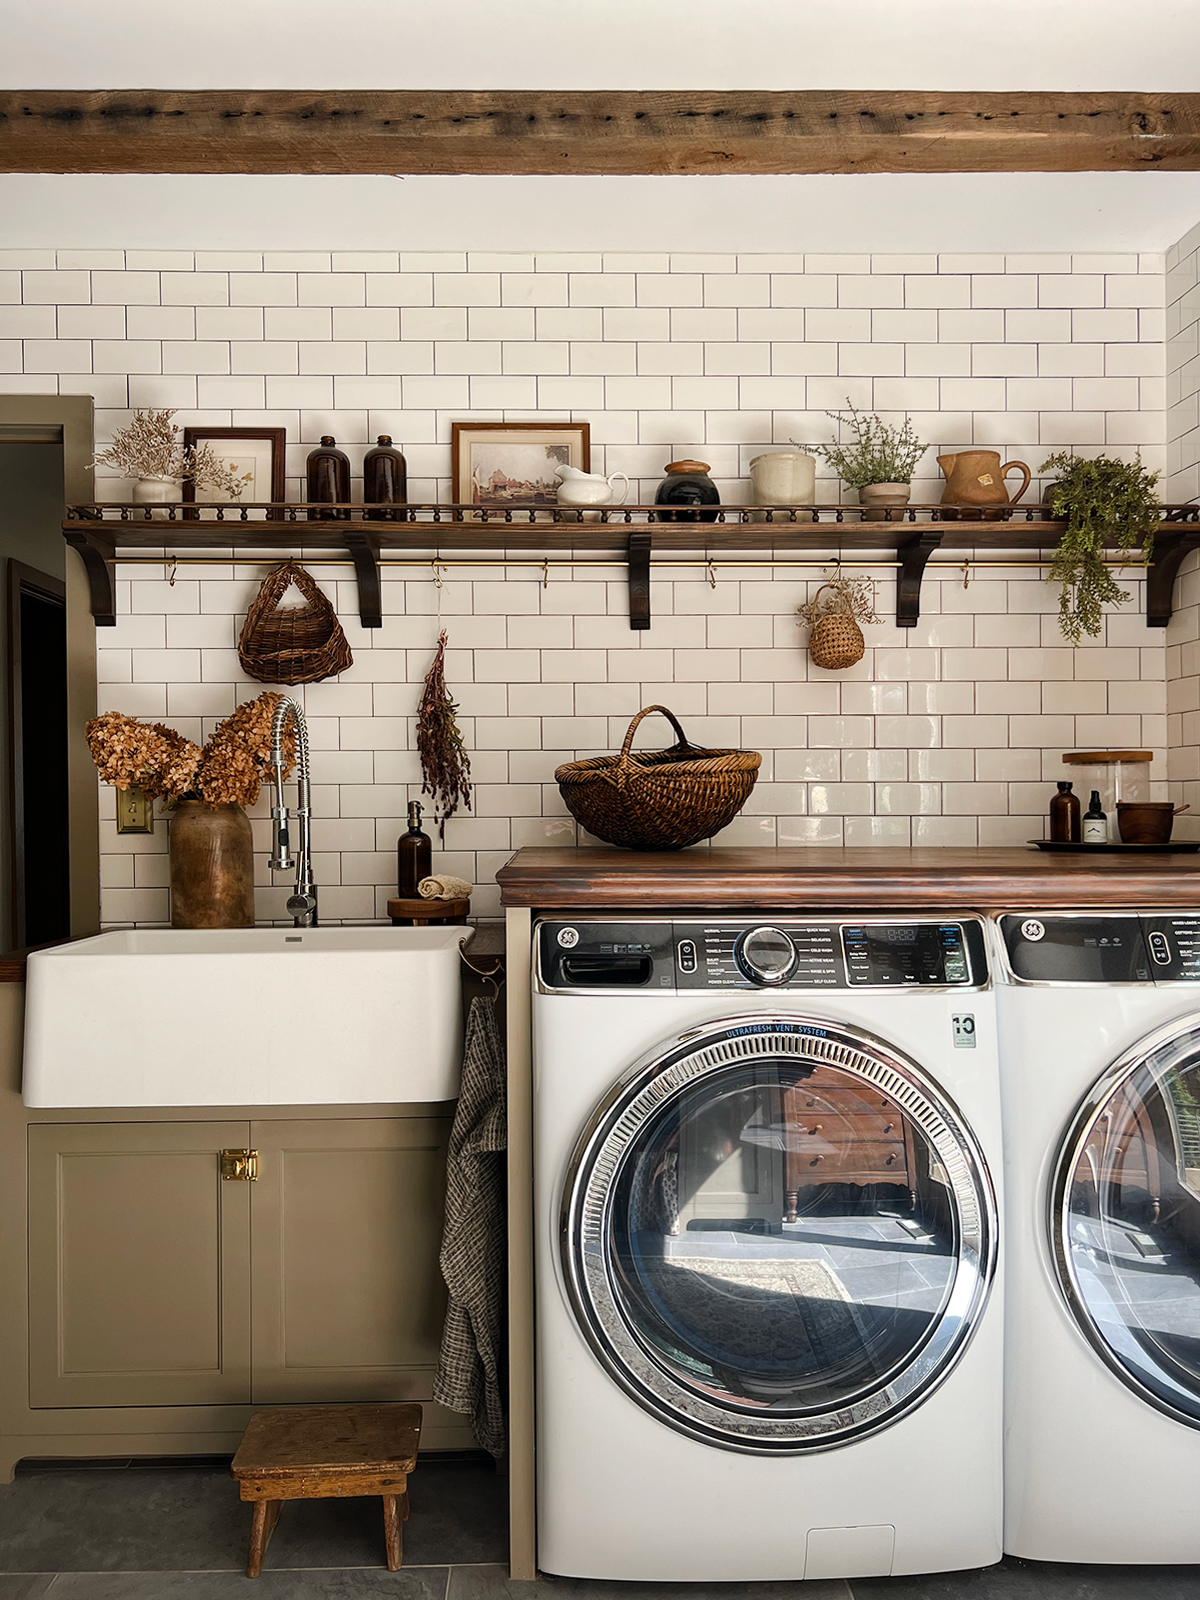
Honestly not too much changed on this side except for the shelf. The first one we hung up was small and didn’t fill up the whole wall and just seemed kind of random. I have no idea why I went with that size!
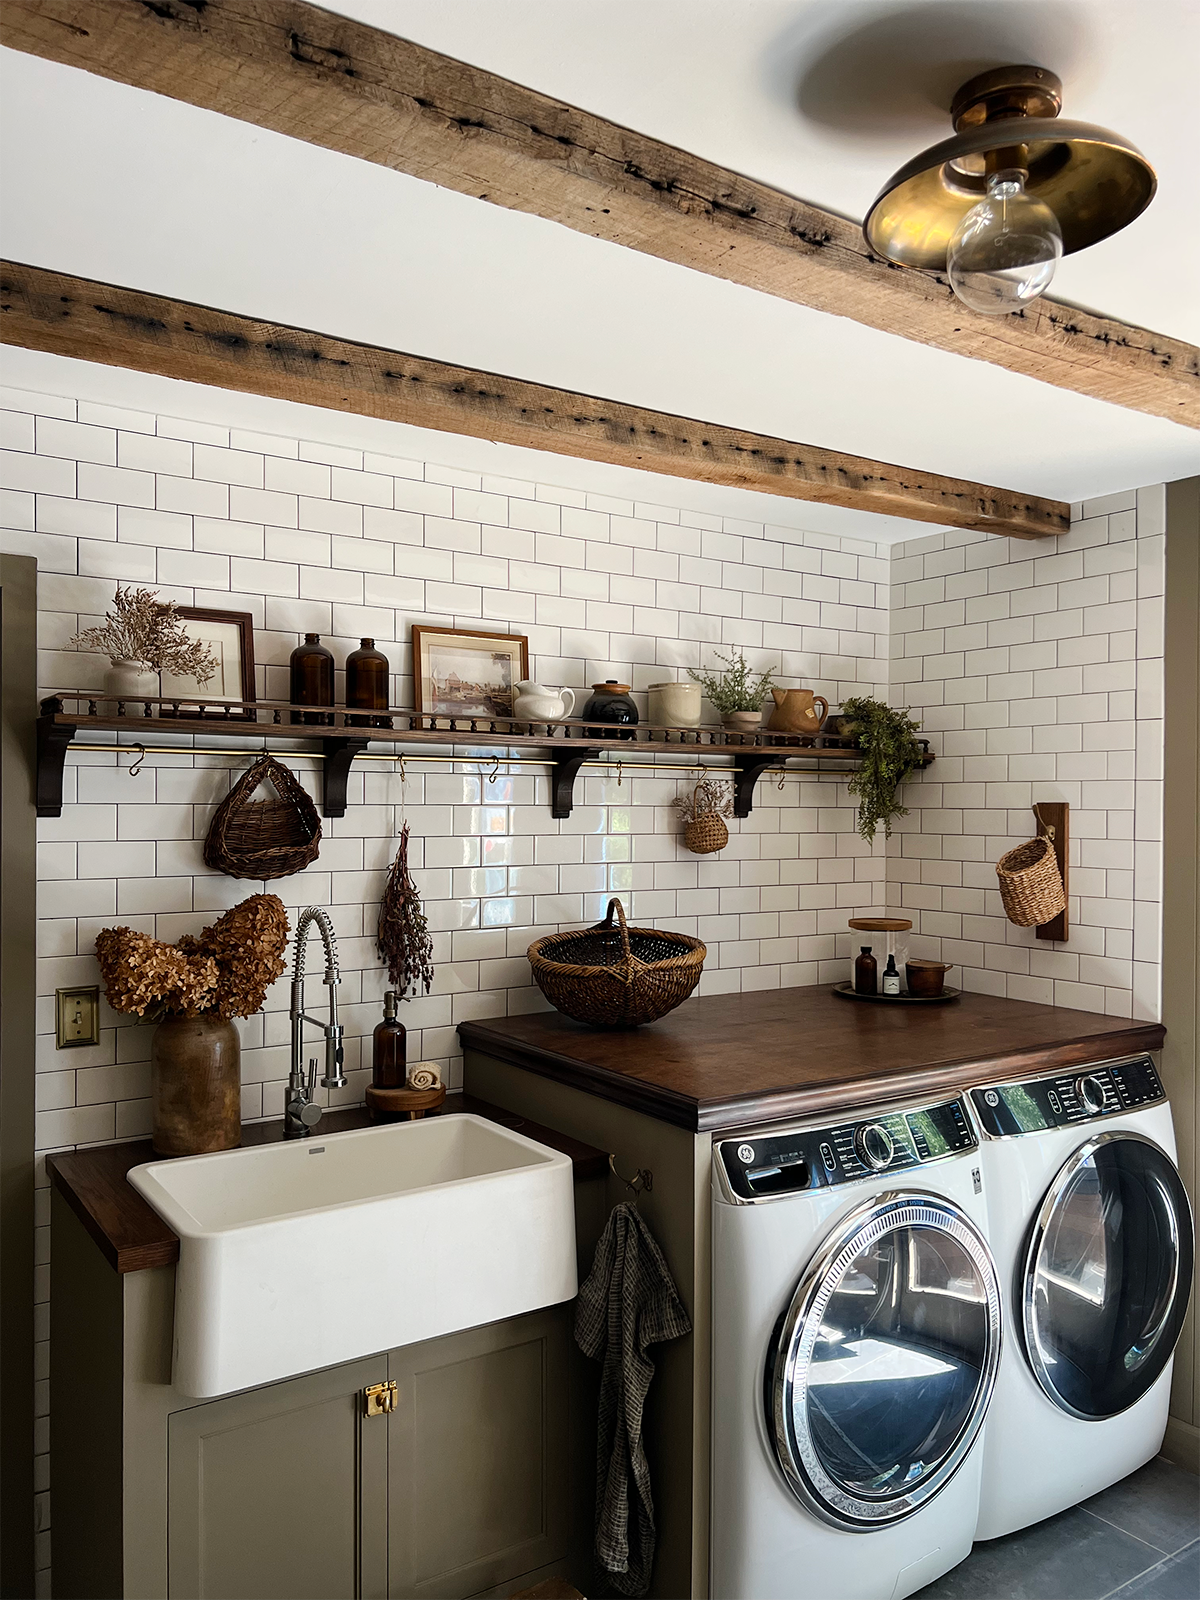
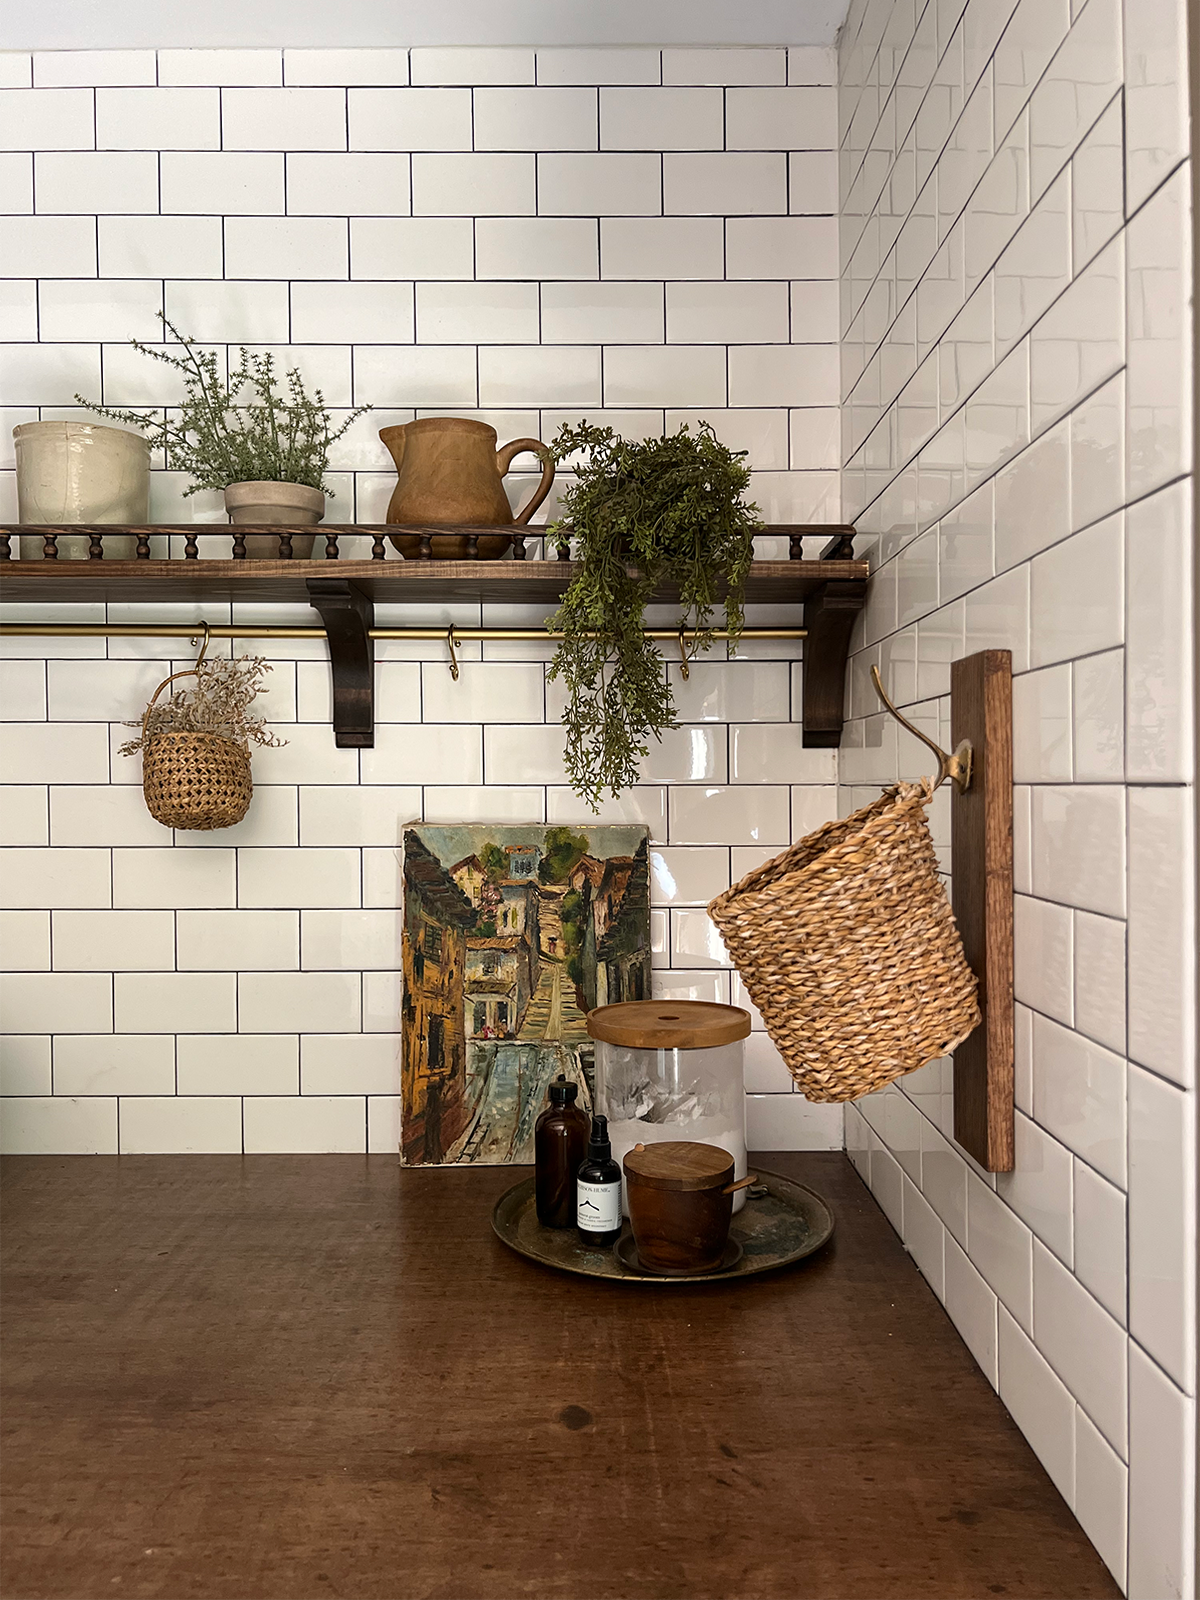
I knew having it go across the whole wall would make it feel more like a part of the space and also give me more room to put things. But instead of just having a top shelf, I also added a brass rail below to hang things from. This made it even more functional and also added another beautiful element to it.

You can read more about how we built the shelf and get the whole tutorial.
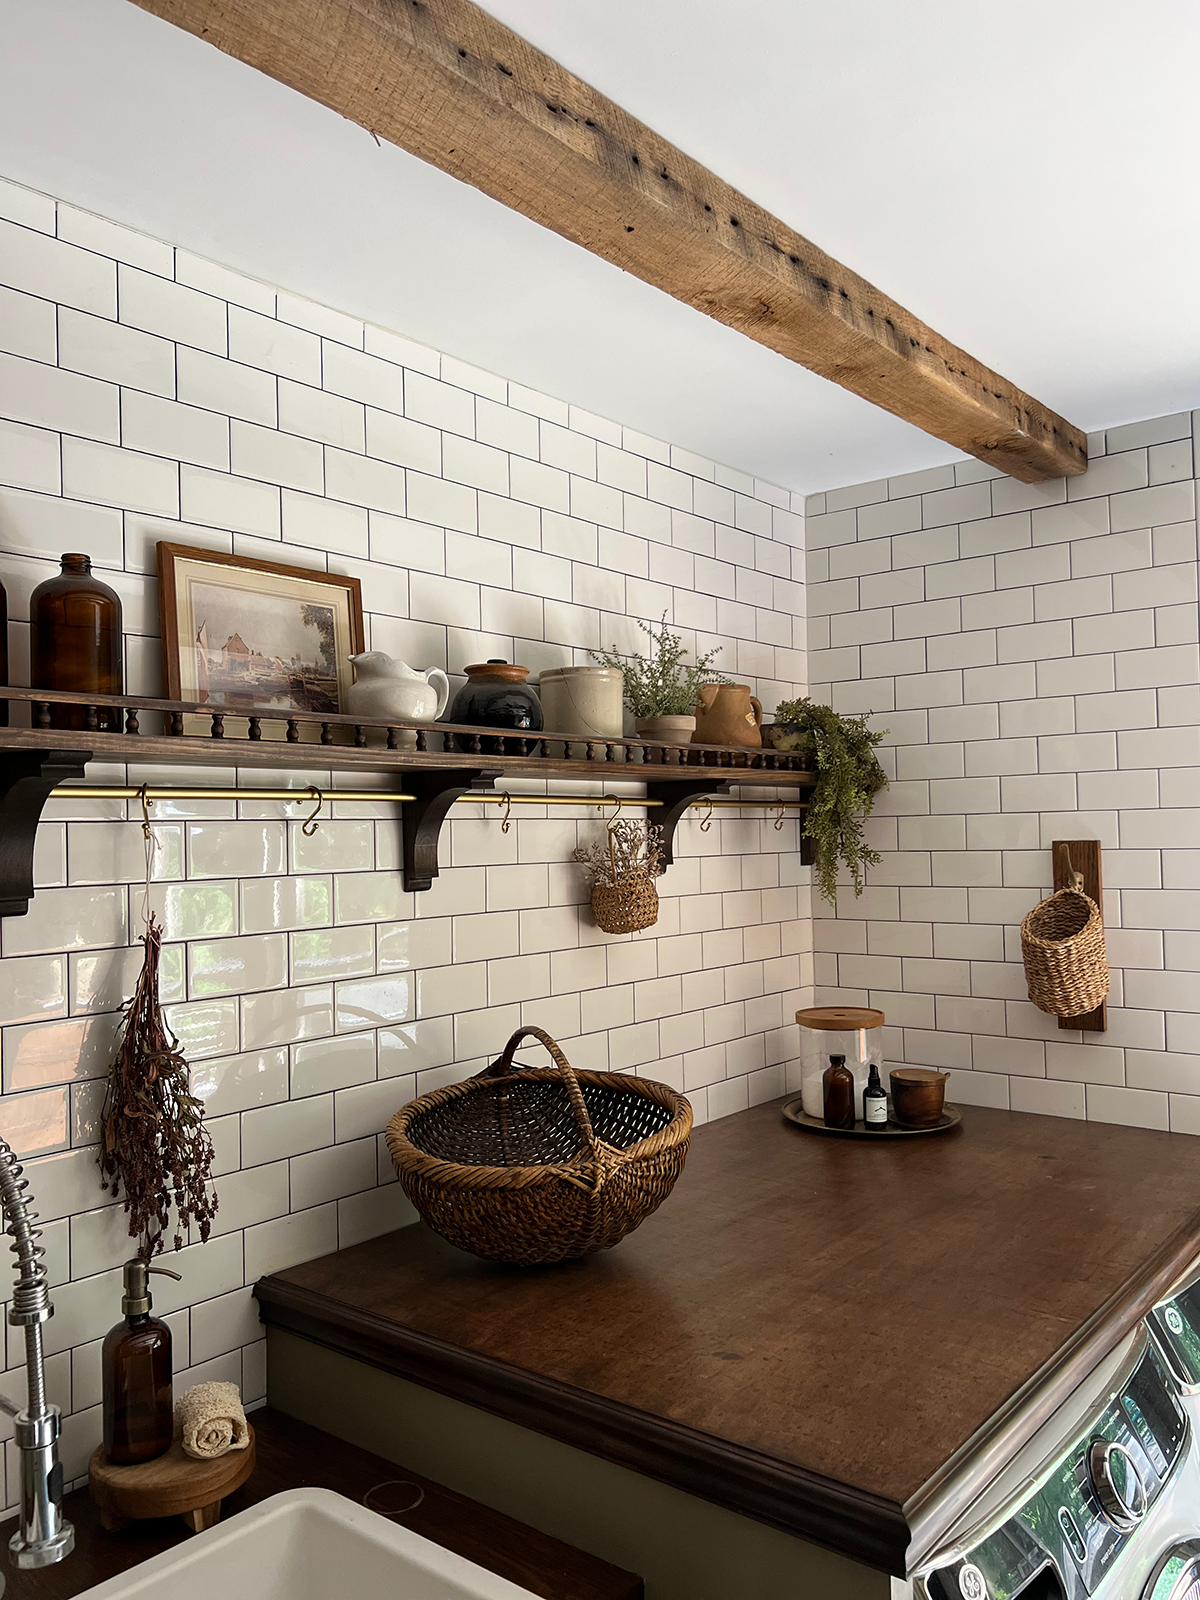
The counter on the washer and dryer was an old door slab we purchased at a warehouse for $20. It was still in good shape but I wanted to darken the stain so I sanded it down and gave it a fresh coat.
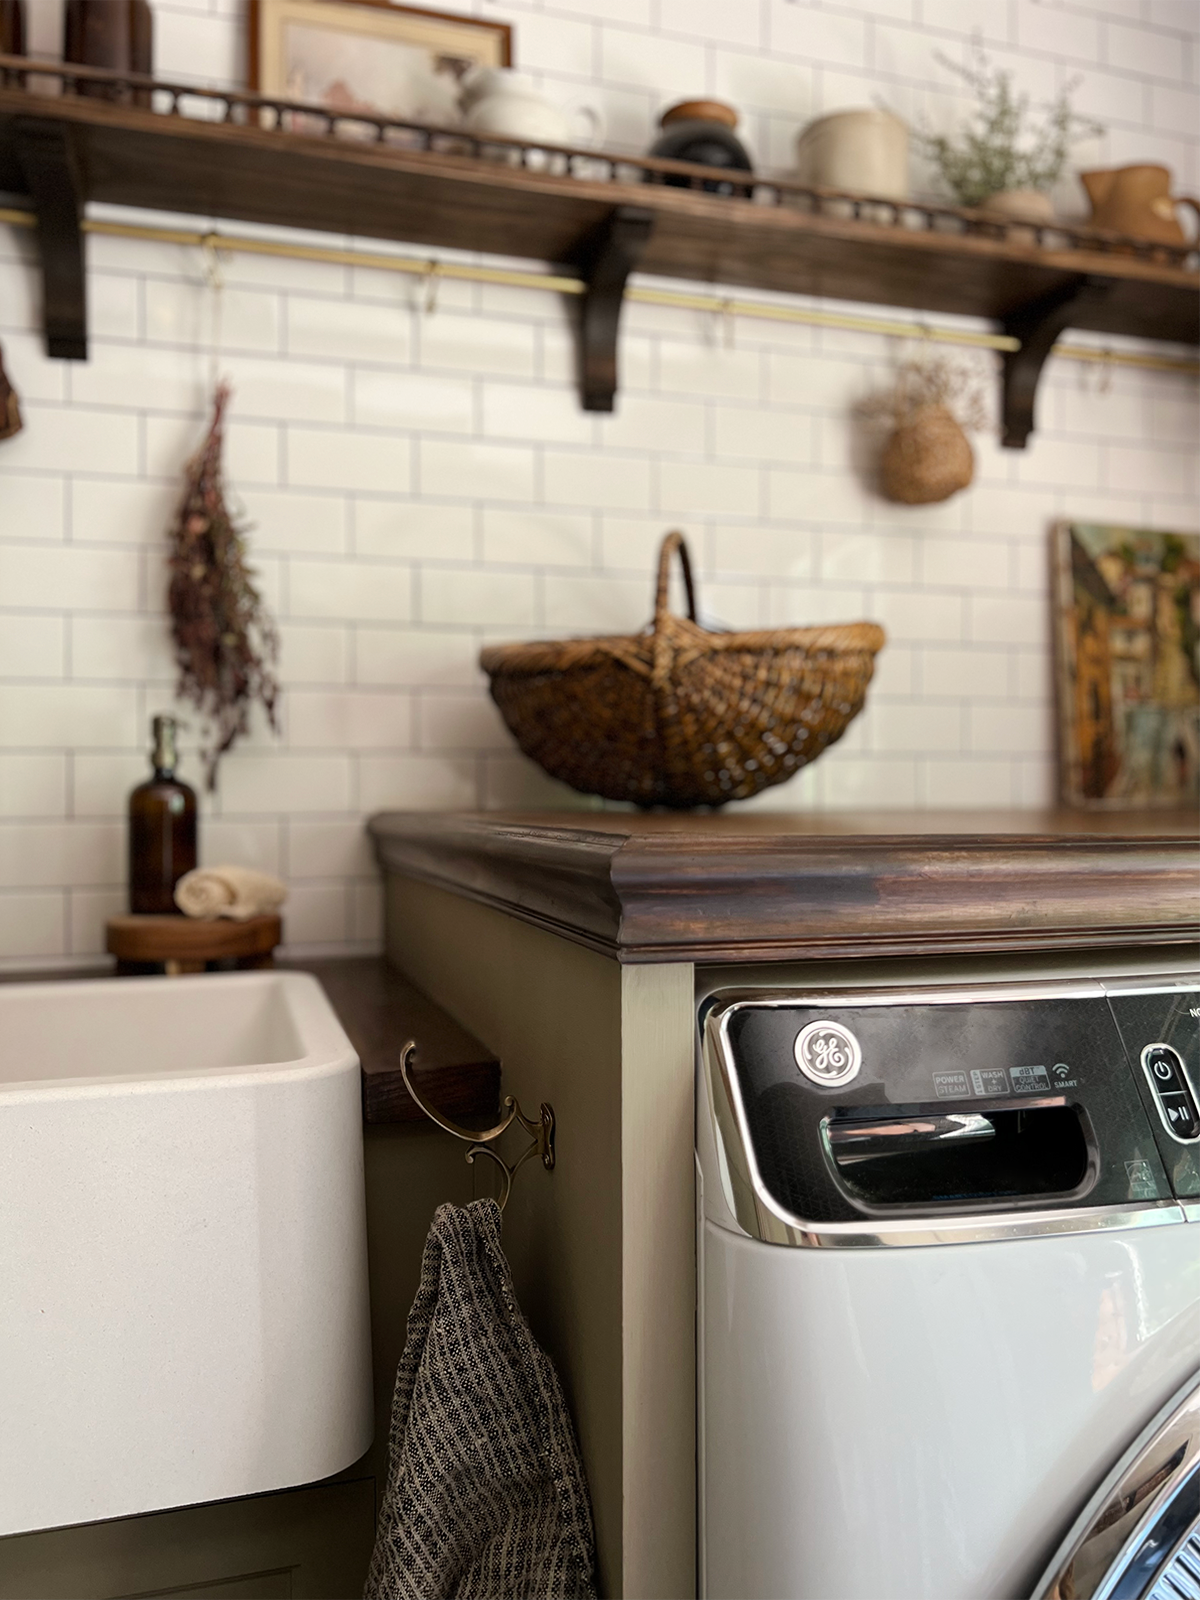
To make it look a little more visually appealing, I added some trim around the edge which was such a simple addition, but completely transformed the look.
THE BEAMS
Another goal for this space was to infuse as much character as possible. One way we did that was by adding rustic beams to the ceiling. They’re from an old barn that collapsed 5 minutes from our house and I love that they bring in a little piece of local history to this room.
Since they’re only 3 inches thick we just screwed them right into the studs using countersinking screws. The holes are hardly visible!
THE DETAILS
The details of a space are always my favorite and I had so much fun styling and decorating this room! It definitely has a different vibe now but it’s a testament to how my style has evolved over the years and the different skillsets we’ve learned.

We hung these beautiful brass hooks above the bench which is where Dan and I put most of our things. The stained peg hooks give the kids plenty of room for all of their bookbags and coats.
I switched out the rug for a new one of a kind from this vintage rug shop on etsy. Using vintage rugs in here has always served me well since they hide dirt and stains well but are easy to clean too. You can read more about how I keep my vintage rugs clean.
The knobs on the cabinets are unlacquered brass and l Iove that they have a little backplate. A small detail that makes them a little more unique than a stand alone knob.
For the sink cabinet, I used the same unlacquered brass latch that I used on the corner cabinet in our kitchen.
I kept our lint basket the same because I love it so much and it’s worked so well. This is where all the dryer lint and little sprinklets of garbage I find in everyone’s pockets goes. It’s way cuter than having a garbage can somewhere!
It’s so fun to look back on the evolution of our laundry and mud room and see how much we’ve grown as DIYers and me as a designer. Yes, the room was perfectly fine before but paying closer attention to the smaller details really elevates a space. I never want to stop learning and growing and updating this room shows that it’s worth it to make those changes and create something you love.

SOURCES
Paint Color: Mouses Back by Farrow & Ball
Shiplap Panels
Cabinet Doors: Fast Cabinet Doors
Floors: Sintesi Atelier Porcelain Tile in the Color Fumo, Size 12×24
Subway Tile
DIY No-Sew Pinch Pleat Shoe Curtain
GE Front Load Washer
GE Front Load Dryer
Floral Block Print Fabric
Brass Curtain Rod – Custom made from Pepe and Carols
DIY Shelf with Wood Gallery Rail
Baskets
Flush Mount Light
Sconce Light
Sink
Brass Knobs
Brass Hooks
SHOP THE ROOM


Cici Haus
Love, love, love, love it! I was all set to choose a deep mahogany/purple color for our kitchen cabinets but I’m going to pick up a sample of Mouse’s Back today…
Kristi
Bre, your taste and eye for detail is impeccable! It’s so lovely while being functional!!! Sooooo so good!! I especially love that you share tutorials that are easy to follow. Thank you for taking the time to do so! So beautiful!!!