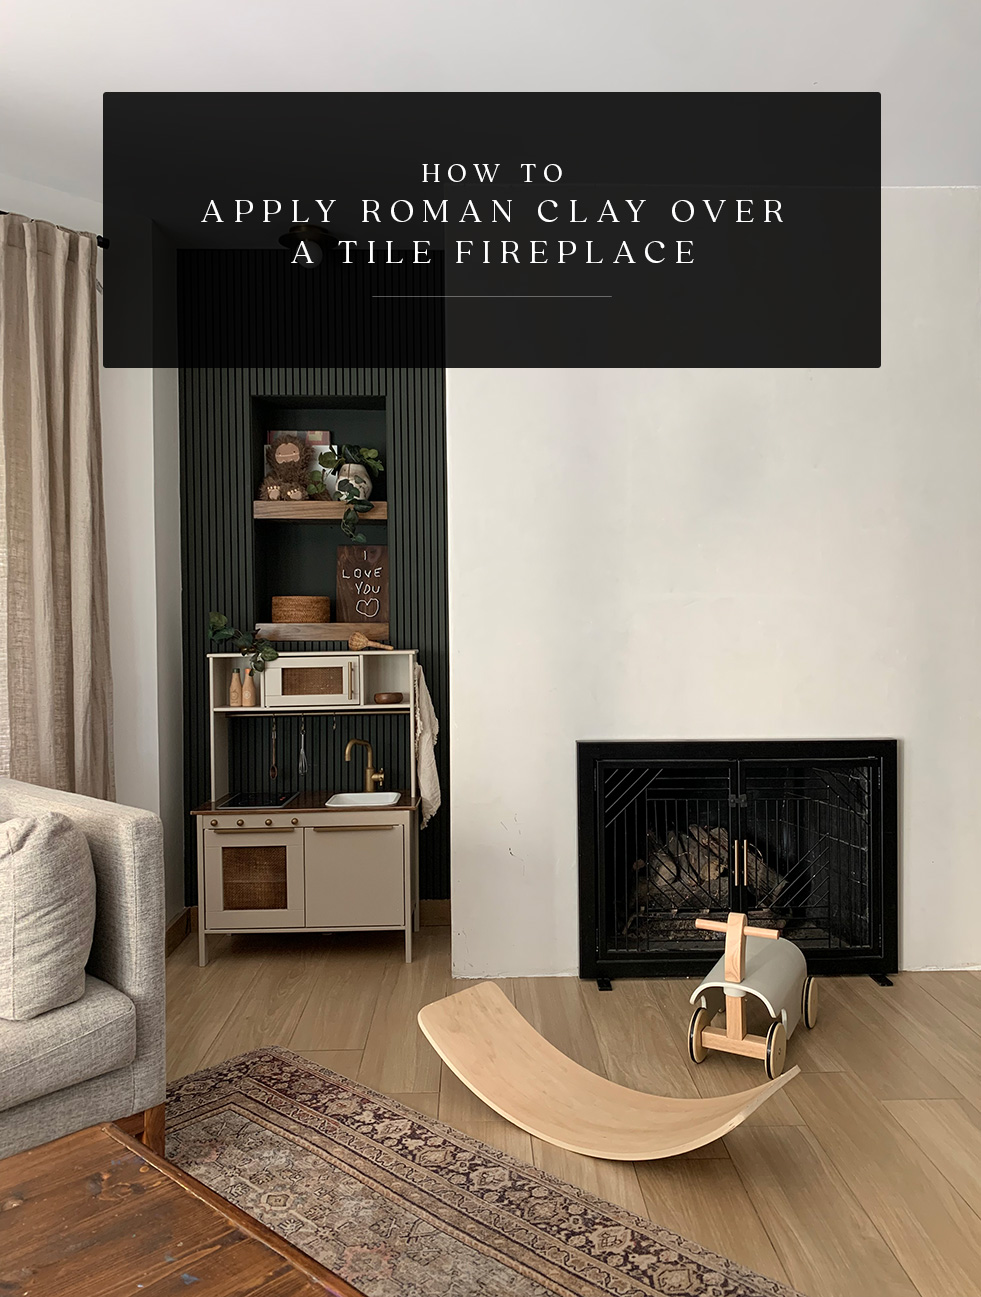
I took you all through the process of renovating the fireplace in the kids playroom on instagram but I promised you a blog post too so here it is! I’ll walk you through all the steps we took to create our DIY Roman Clay Fireplace, going right over the existing tile.
WHY ROMAN CLAY?
From the start, I knew I wanted a plaster type finish but wasn’t sure exactly how we were going to achieve that. I reached out to a local guy who gave me some samples of his plaster which was NOT what I wanted at all. Plaster isn’t as popular as it used to be, so it’s a little tricky finding someone to do it.
A lot of guys who used to do plaster have turned into drywall guys so you could always try searching for someone in that speciality if you don’t want to do it yourself.
For us, I started realizing it would just be easier to do it ourselves, so I needed to figure out what product would give us the best results.
I had seen a bunch of other bloggers and instagrammers use Portola Paints Roman Clay to achieve the smooth cloudy finish so I started looking into that.
Our biggest obstacle of course was that we didn’t want to rip out our existing fireplace. The shape was clean and modern so we didn’t need to restructure it at all. And it would have been a HUGE mess to rip off all the tile – so we decided to go right over it!
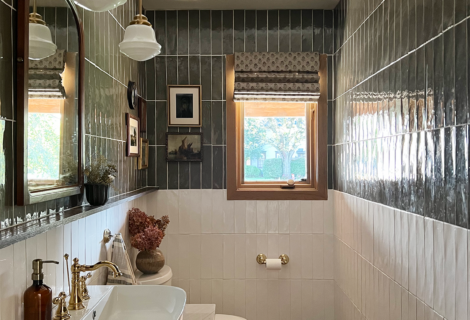
We did something similar when we tiled over tile in our half bathroom but this was going to be a slightly different process.
OUR TILE FIREPLACE BEFORE
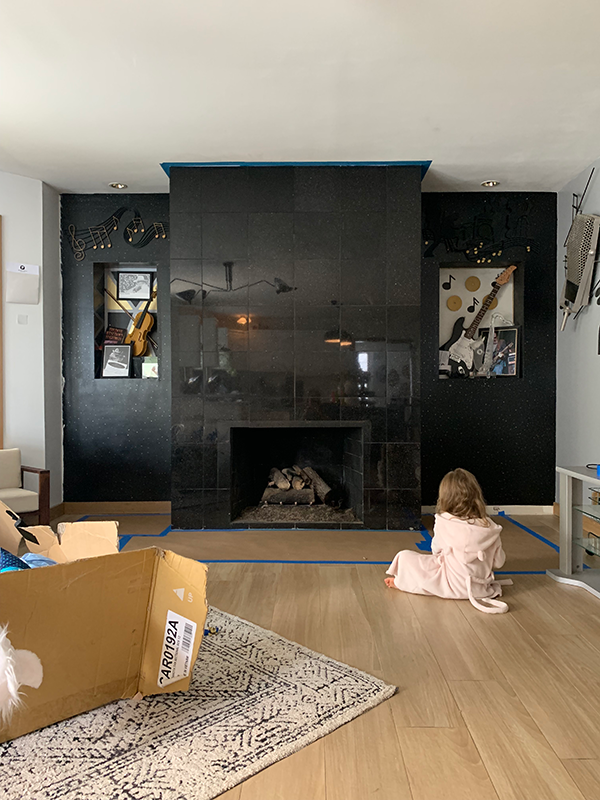
Portola Paints Roman Clay is recommended to go over a smooth, flat surface (like drywall). I called them and asked about going over tile and they didn’t really suggest it. We thought about drywalling over the tile, which I’ve heard can be done but isn’t necessarily a good option.
So we decided to essentially skim coat the fireplace to get rid of the grout lines and create a more uniform surface to apply the roman clay. Here’s how we did it!
HOW TO PREP YOUR SURFACE FOR A ROMAN CLAY FIREPLACE
STEP 1
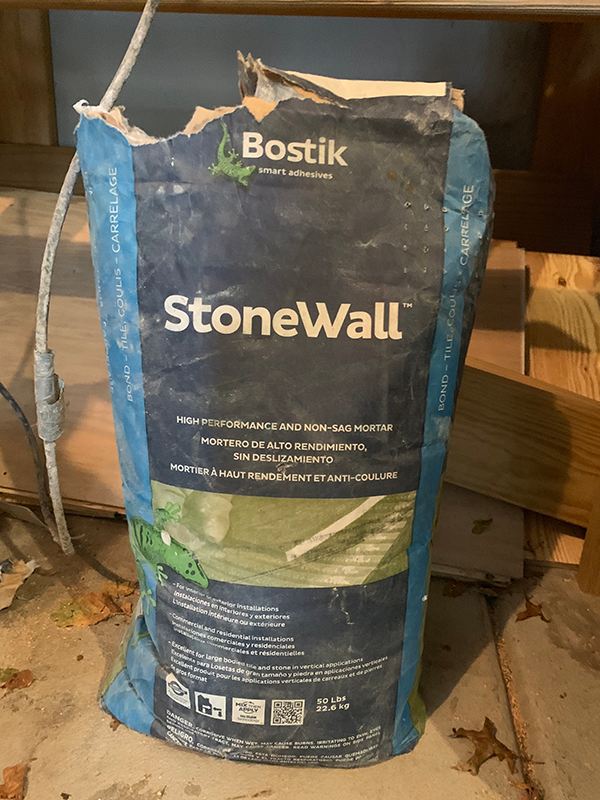
Skimcoat! Mix up a bag of Stonewall Mortar to a creamy consistency. It should be soft and little wetter than how it would normally be if you were using it as setting material to lay tile. I’d say almost like toothpaste!
STEP 2
Apply the mortar directly to the tile surface. My FIL used an 11″ trowel to do this.

STEP 3
After it’s dry, you’ll want to sand down this first coat. It will still be pretty rough and have lots of peaks and valleys. I used a large hand sander with drywall sanding paper.

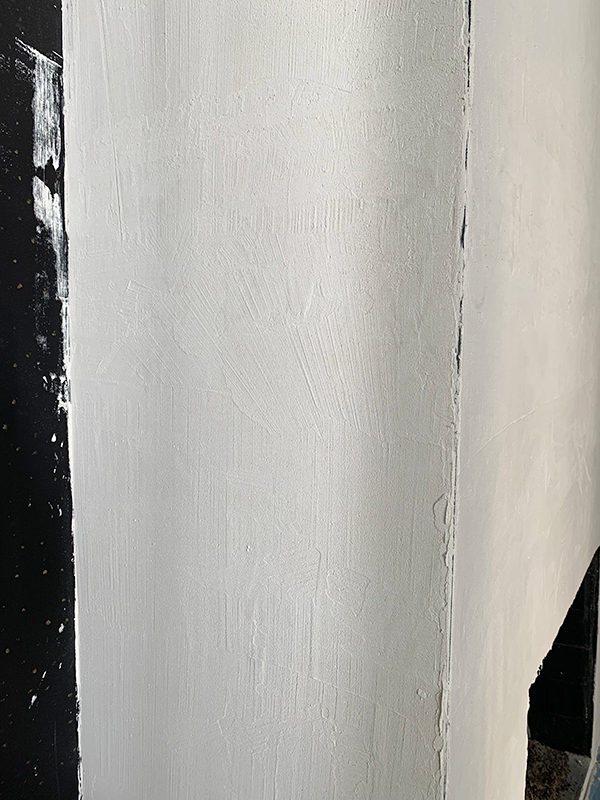
This is how it looked after the first coat – still pretty rough.

STEP 4
Apply a second coat of mortar the same way you applied the first.
STEP 5
Sand again. After our second coat we realized it wasn’t getting quite as smooth as we wanted – even after sanding. It had a lot of lines on it and was still very rough.
So my FIL had an idea to use a thinner consistency thin set to do a third coat and that was the trick!
STEP 6
Apply a thin layer of thin set (large tile & stone mortar) over the mortar trying to achieve the smoothest finish possible.

He mixed it using this flexible additive milk instead of water for a little better adhesion. Perks of having a FIL who lays tile for a living is having all these products on hand 😉

You couldn’t use thin set from the get go because the mortar is a lot thicker and stronger and will stick to the tiles better, but it acted as a great final coat.
You can see how much smoother it was which was exactly what we wanted!

To give you an idea of the texture, here is a photo of the first, second and third coats.

STEP 7
Sand again.
STEP 8
Fill in any holes or big gaps with spackle and sand those down once dry.

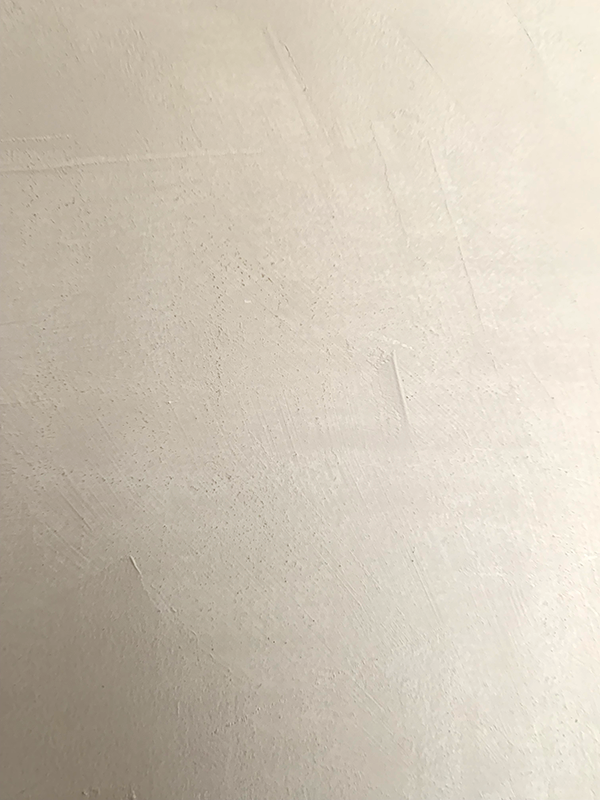
Now we had a fairly smooth surface to apply our roman clay to. It definitely wasn’t as smooth as dry wall and still had some imperfections, but the grout lines were gone and I kind of wanted an earthy, imperfect look anyway.

So now let’s move on to the roman clay! I used the color Full Circle at 75% so it was just a tiny bit lighter than the actual color. They have SO many colors to choose from on their website and can also do custom colors. I ordered samples so I could see how the colors look in our home which was super helpful.
SUPPLIES FOR CREATING A DIY ROMAN CLAY FIREPLACE
- Portola Paints Roman Clay – I ordered a 4 Kilo bucket which covers approximately 100 sq. ft.
- Primer
- 6″ putty knife
- Optional Smaller or same size putty knife to scoop the clay out of the bucket
- Sand paper
- Portola Paints Sealer (optional)
HOW TO APPLY ROMAN CLAY TO A FIREPLACE
STEP 1
Prime! It’s recommended that you prime your surface first before applying the roman clay. Portola Paints makes a special primer you can buy from them, but it isn’t necessary. You can purchase regular primer from the hardware store and it works just as well.

I used this KILZ Premium Primer and applied just one coat.

STEP 2
Next up is applying your roman clay!

They have a YouTube video on their website you can watch to get an idea of the process but there is lots of room for messing up because there really isn’t just one way to do it. Everyone who uses and applies roman clay, will end up with a different finish which is what makes it so unique and fun.
Here’s a quick video of me applying the roman clay if you want a better visual of the process!
If you want to see some more video action – check out my Fireplace Highlights on Instagram.
It helps to use your smaller putty knife and scoop a small portion out of the bucket and then wipe that on to one side of your larger putty knife.

Once you get in a rhythm it goes quite quickly. You want to vary your strokes so that you achieve that cloudy look which happens by pushing harder in some area. This way there will be spots with less roman clay and spots where it is applied a little heavier.

STEP 3
Sand. Use a light grit sand paper to sand down the entire surface. The edge of your putty knife will create little raised edges, but they are easy to sand down to get a smooth finish.
I continued to use the same drywall sander I used from the start because at this point it was pretty worn down. Make sure you use a light grit sand paper, it doesn’t need to be super course – the roman clay sands really easily!
STEP 4
Apply your second coat. It’s really up to you how many coats you do. I ended up doing two plus some touch up areas.

At this point after my second coat, I will note that I started to notice some black marks on my fireplace. I’m still not sure 100% what happened. What I believe was the culprit was the metal edge of the putty knife creating those marks.
Possibly because I had such a hard, rough surface underneath the clay and not drywall? It’s hard to say. Honestly I’m probably the only one who would notice them ha.
I thought sanding would get rid of them but it didn’t so I ended up getting a plastic putty knife and going over just the black spots. There have been many people who have done this and haven’t had a problem with getting marks like these, but to be safe I would probably use a plastic knife.
Someone also told me there are putty knives with rounded corners so that sharp edge doesn’t scrape against your wall too much.
At the end of the day, there are definitely some imperfections but I like to call them character 😉
STEP 5
Sand again. You’ll be amazing how smooth this finish is – I couldn’t stop touching it!
STEP 6 (optional)
Apply your top coat. This isn’t a necessary step, but since this is in the kid’s playroom and it’s a very light color, I wanted a little extra protection on it.

I put two coats on – and a little goes a long way. I have practically the whole bucket left. There’s no need to sand again after this unless you notice any big bumps you want to smooth out.

You apply it the same exact way you apply the roman clay. I used the plastic knife this time and didn’t have any marks.
The next project we finished in this space was the green wood slat walls – they added another beautiful texture to this space.

I’m obsessed with how it turned out and couldn’t love it more. Roman clay is such a fun product to work with. It’s the perfect finish for our fireplace, even if it did take a little extra work, it was totally worth it!
I hope this tutorial on how to create a DIY Roman Clay Fireplace was helpful! Do you think you would try it in your own home?


R W
When you say you used 75% Full Circle how did you exactly do that?
brepurposed
You can ask Portola to do it when you order! It just means it’s 25% lighter.
Tara Schoessel
Hello,
What kind of fireplace do you have? When you contacted the company did they mention if it was heat resistant or have you personally had any problems with it after using the fireplace?
Priya
Hi! What color did you use?
brepurposed
Full circle