Ok I wanted to get this post out way sooner but ya know, life happened. So it’s finally here for you today and I can’t wait to share all the details on our gorgeous Custom DIY TV Stand with Sliding Doors!
CUSTOM DIY TV STAND WITH SLIDING DOORS

I’m calling it custom DIY because it was a combination of both. I’ll start from the beginning in case there are some new people around here who didn’t follow along with my One Room Challenge room makeover.
It all started when I got an Arhaus catalog in the mail and fell in love with this Wall Unit.

It’s so beautiful isn’t it? Except the price tag was not as beautiful. Even on sale, it’s not something we were going to invest in when we knew we could potentially DIY it ourselves. I asked Dan what he thought and of course he said “oh ya sure that will be easy” because he could never admit that he couldn’t do something :-p
So my plan was to reach out to a local lumber company, Baird Brothers, to see if they would just provide some wood for us to build it. I wanted to make sure we were using good, quality wood since it’s such a large piece.
They agreed to providing the wood and they started drawing up some plans for me. After some back and forth this is what we ended up with.
PLANS FOR CUSTOM DIY TV STAND WITH SLIDING DOORS
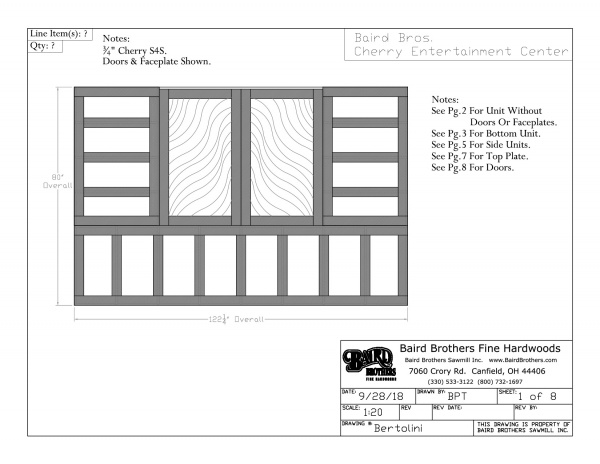
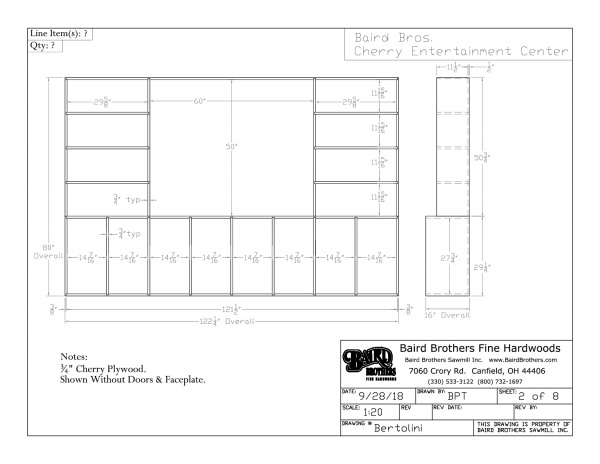

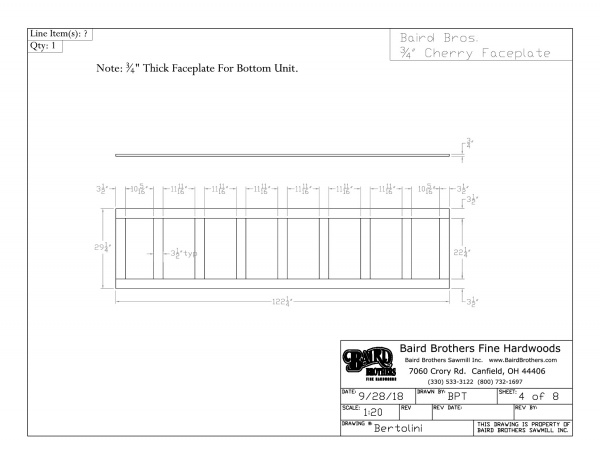
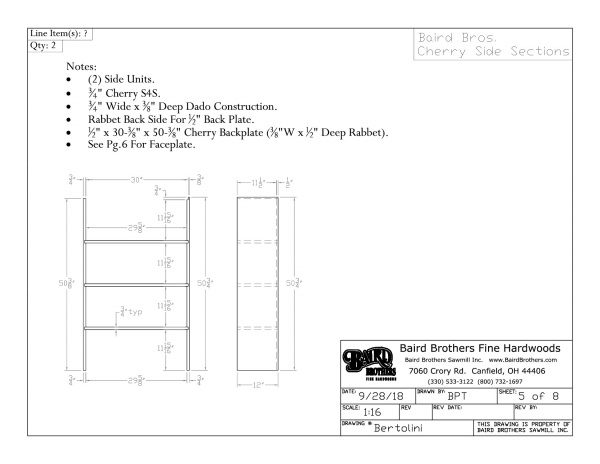
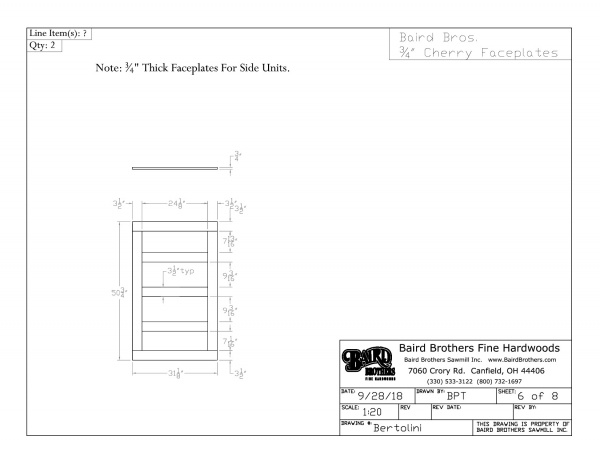
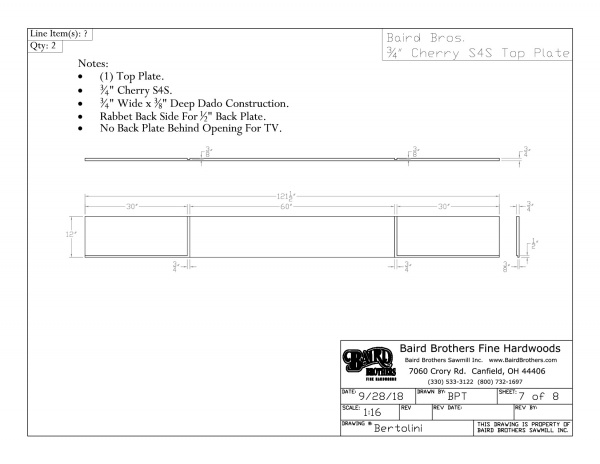
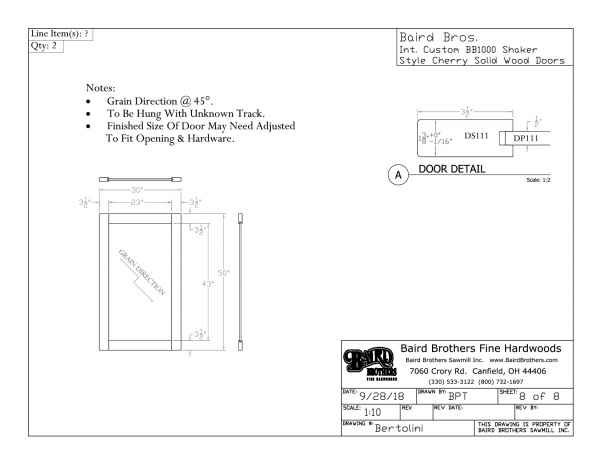
Feel free to DOWNLOAD THE PLANS.
Once those were finalized, I had to pick out some wood. I chose to go with cherry plywood. Baird Brothers was originally going to stain the wood and just cut it to size for us, but their staining process takes time and we couldn’t wait since we had to get this done in time for the ORC reveal.
They gave me some pieces of different woods to take home and stain myself to see which I liked best and cherry ended up being perfect for the dark stain I wanted to use.
Once they got started on the project and began cutting the wood, they realized it might just be easier if they put it together for us too – to which we said YES PLEASE. We were already crunched on time with all the other projects we took on so this was a welcome surprise.
So they were going to assemble, the bottom base and the two bookshelves and then we were going to have to stain it all, attach all the cabinet doors, attach and install the barn door hardware, install all the other hardware, put on a back and add legs. Still A LOT of work.
They delivered everything when it was done which was THE BEST DAY EVER.
This is the bottom base.

Here are the bookcases.

And the sliding doors.

I’m not going to lie I was SO nervous to start staining it. I wanted it to be the perfect color and it took a lot of trial and error and mixing stains.

The winning combo ended up being ONE COAT OF PROVINCIAL AND THEN ONE COAT OF DARK WALNUT.
I got to work staining in our garage. As you can see on top of the base piece, they put two pieces of wood where the bookshelves were going to be to help them stay in place. We screwed them in too of course but it was nice to have those as a guide.

So.much.stain.


Once everything was dry, I applied this wipe on poly. I use an old shirt or sock which works great.

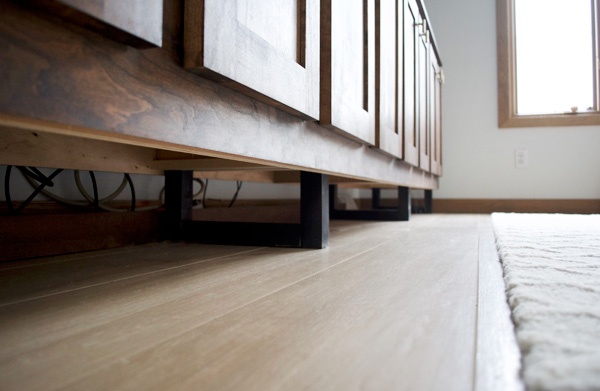
Now that that part was done – we had to figure out the type of legs we wanted on it. I would have been totally fine with it being flat on the ground, but we have an air vent on the floor on the wall where it was going so we needed it to be raised a bit.
I wanted something simple but sturdy enough to hold up the weight of it all. Baird Brothers gave us some 2x2s to use so we ended up cutting those and making these. We actually made four total and used the kreg jig to pocket hole them together.

Then I used this rust-oleum spray paint to paint them.

The last thing we needed to do before we brought all the pieces inside and assembled it was to attach the legs. I apologize for not having any better photos of this because I forgot to take them while it was outside. So below you can kind of see but I’ll explain it too.
Basically we screwed in a 2×4 at each spot we wanted a leg to go. Then we pocket holed the leg to the 2×4 and then screwed in a 1×2 on either side of each leg for some extra support.
ASSEMBLING THE DIY TV UNIT WITH SLIDING DOORS
We brought in the base piece and then we brought in each bookshelf and set them on top. As I mentioned above, once the bookshelves were in place, we screwed them into the base using dark screws so you can’t see them.

The next step was attaching a long piece of wood across the top that we could attach the barn door track to. Our piece of wood is 5″ wide.

This is the sliding barn door hardware that we bought on Amazon. I initially wanted hidden hardware like the one from Arhaus, but I couldn’t find any online that would support the weight of the doors we had.

The only thing we had to do was trim the length of it…which we called in my FIL to do. He used his multi-purpose oscillating tool with a blade meant for cutting metal.

Once that was done, Dan attached the track.

Voila! Now as you can see there is no back to it yet. I thought this was something they had included in the plans but they actually didn’t. But Baird Brothers was so accommodating and drove back out with a giant sheet of plywood for us to use. We just screwed it into the back.
The next step was to attach the cabinet doors and install all the hardware. Baird Brothers gave us all the Euro hinges and drilled the holes for them which was another amazing thing they did for us.

All the brass hardware came from Emtek. We used the Freestone Finger Pulls and the Brisbane Pulls.

The very last thing we did was build a little shelf behind the sliding doors for the tv to sit on and to put our cable box and a speaker. We were going to hide them in one of the cabinets but didn’t think that far in advance and once we had this thing in place, we weren’t going to be able to move it to get to all the plugs back there and drill the holes we needed to.
We struggled enough as it was getting everything else plugged in :-p

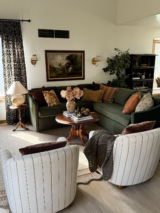
Phew, I think that’s it! This thing was a BEAST to work on and definitely took up the most of our time during the One Room Challenge but it was so worth it. It’s a total show stopper and I LOVE that it hides our television. Here’s a look at it with it open.


I’m sorry that I don’t have more specific step by step plans since Baird Brothers did a lot of the work as well, but hopefully this is helpful! You can also be on the look out for Jen Woodhouse’s plans coming soon because she’s building her own version of this guy too! And she’s insanely talented so I know it’s going to be amazing!
An enormous thank you to Baird Brothers for going above and beyond and helping us bring this guy to life!


Naomi
This wall unit is so so so gorgeous. Definitely better than the original piece you saw. And you get to love it more since you diy’d it, too!
brepurposed
Thank you Naomi!
John
It’s so beautiful. I also wanted to buy when I saw something similar in a shop but yeah, that price tag… Thank you so much for sharing. Now I know what will I have to do 🙂
Pat M.
So amazing. And so much work. You are to be commended over and over for all you’ve done to this outdated home. Your FIL must be so proud of what you’ve done. And you’ve been so fortunate to have his expertise as well. Your style is my style – and I’ve been so amazed at the transformation from the beginning laundry room to the family and dining room . However, in my little old ranch, I’ll just have to live in it vicariously through you and your family. Can’t wait to see what’s next.
brepurposed
Aw thank you Pat! I appreciate all your support over the years! I’m glad I can provide some fun inspo and allow you to day dream in your own home! <3