
Welcome to week 3 of the one room challenge! This past week has been super productive but the biggest progress we’ve made has been on the fireplace! I love how it’s turning out and can’t wait until it’s fully finished. My FIL will be finishing it up this week and then we’ll have to figure out the situation to the right of it.
Before we dive in you can check back on week 1 and week 2 if you missed them!
This week I wanted to share our process of building on to the existing fireplace and prepping it for tile. I feel like every old house has an old outdated fireplace and there are SO many ways to modernize them.
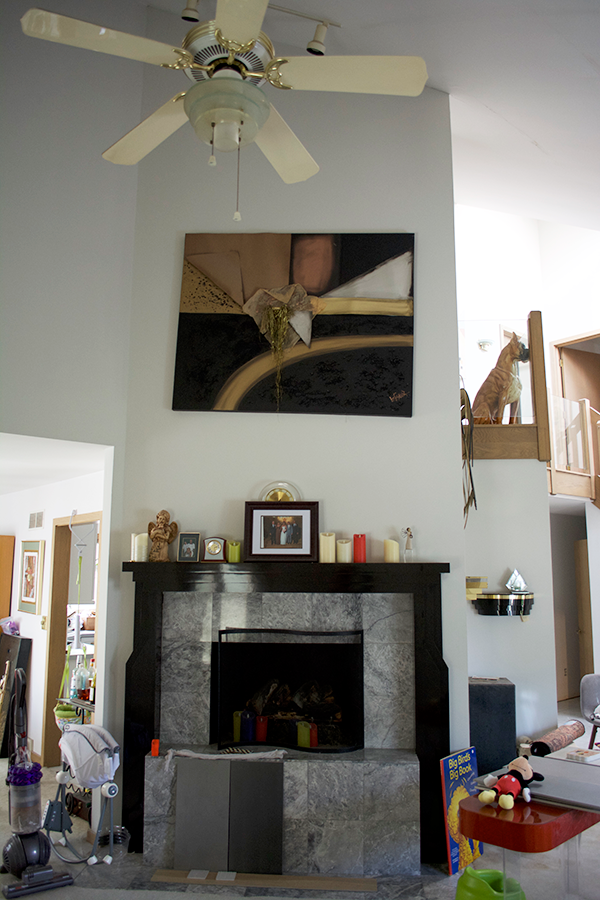
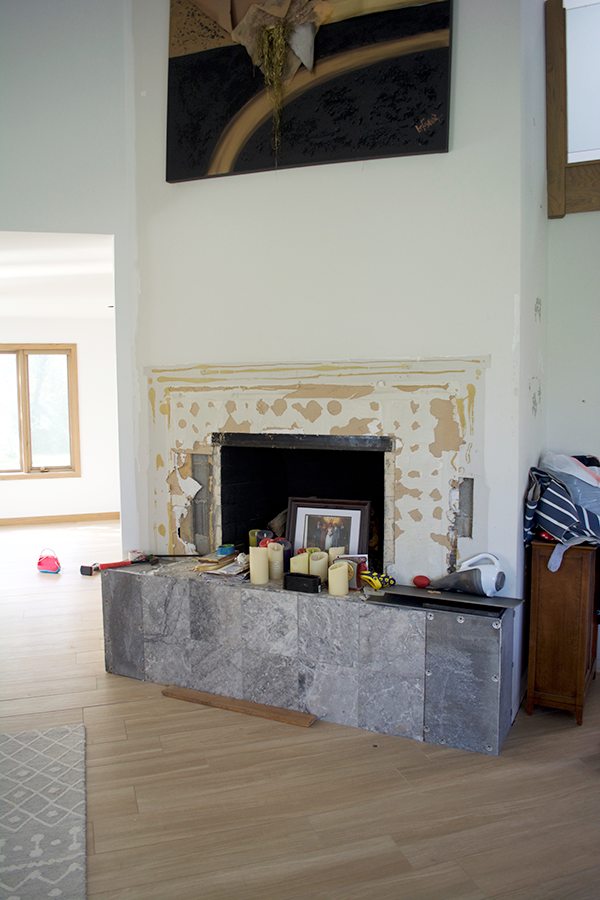
So let’s take a look at what we were dealing with. I feel like the builders totally missed the mark by not making this a floor to ceiling fireplace from the start. However, for our sake, I’m glad he did it this way because it would have been A LOT more work to rip that out.
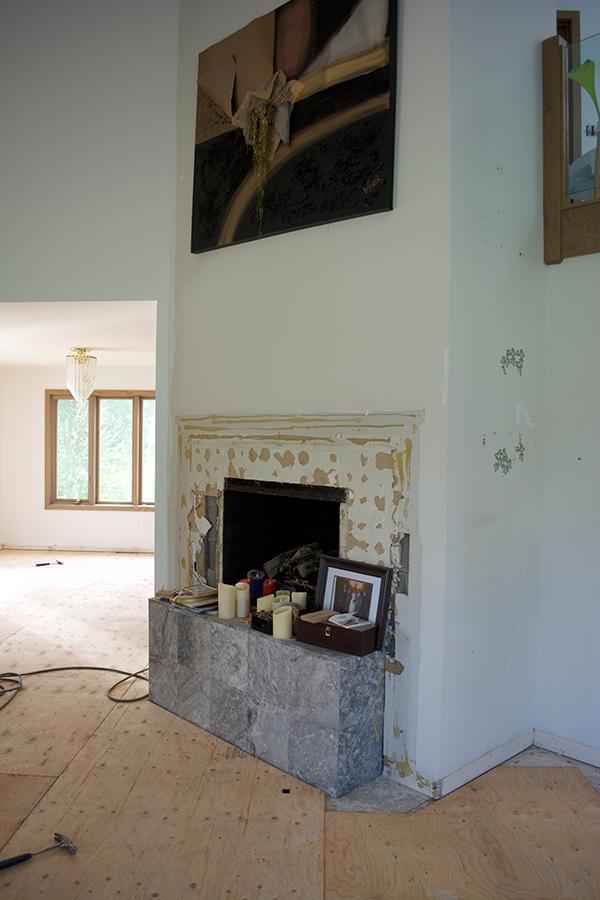
The only real demo we had to do was ripping off the old black mantle which came off surprisingly easily.
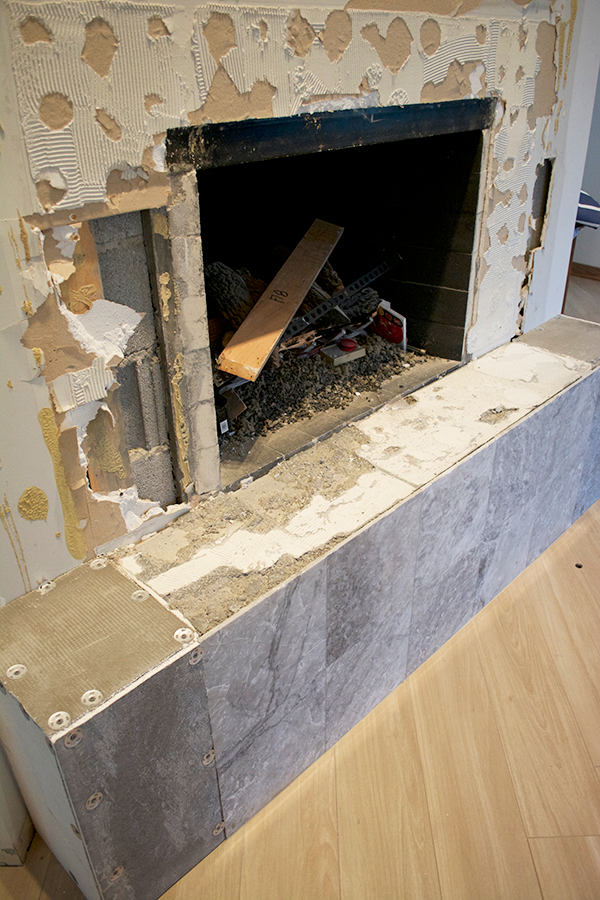
From there, we knew we wanted to build out the sides and extend them all the way to the wall. To do this, we used some wood scraps to build supports and then screwed board backer to those to fill it all out.
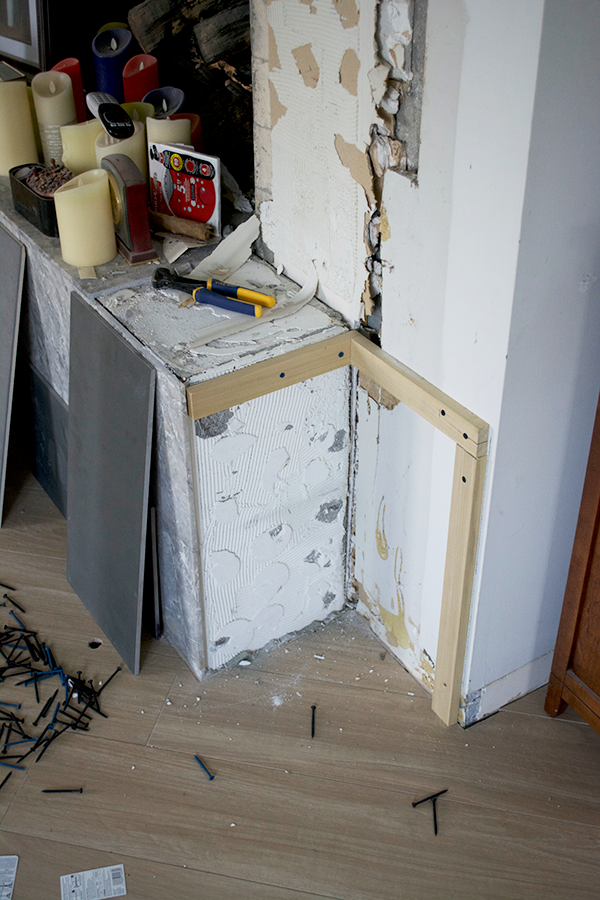
This is what it looked like when that was done. It already felt better!
We ripped off the tiles on the top to get it to the level we wanted and since they were cracking from where the mantle was removed. The ones on the front were still fine, so we left those since they provided a nice smooth base.
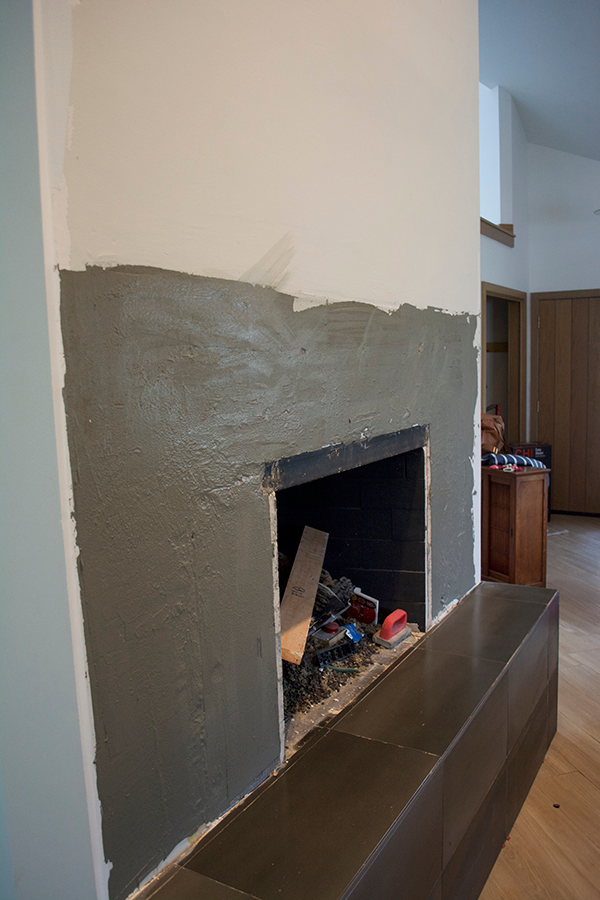
Next up was putting thin set over the whole thing to create a nice smooth surface.
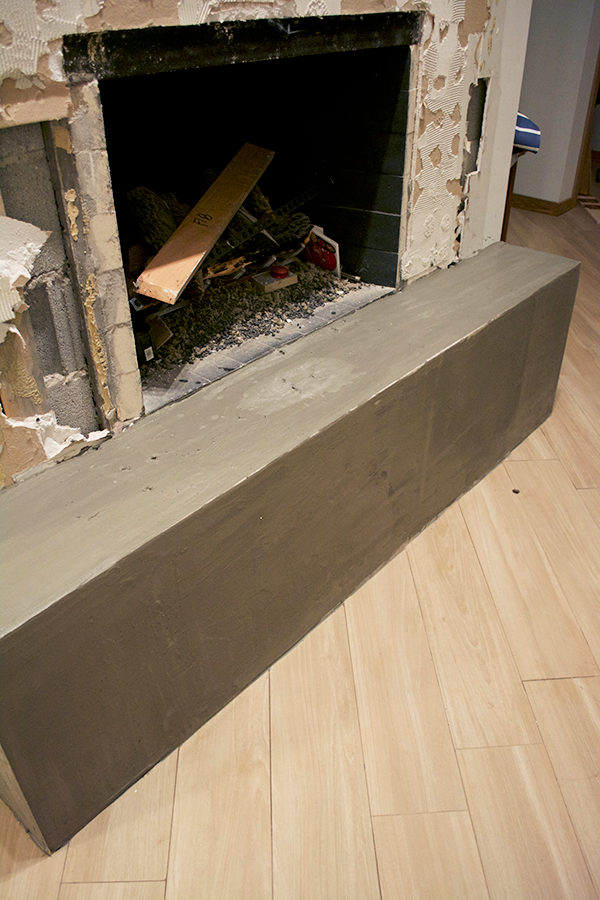
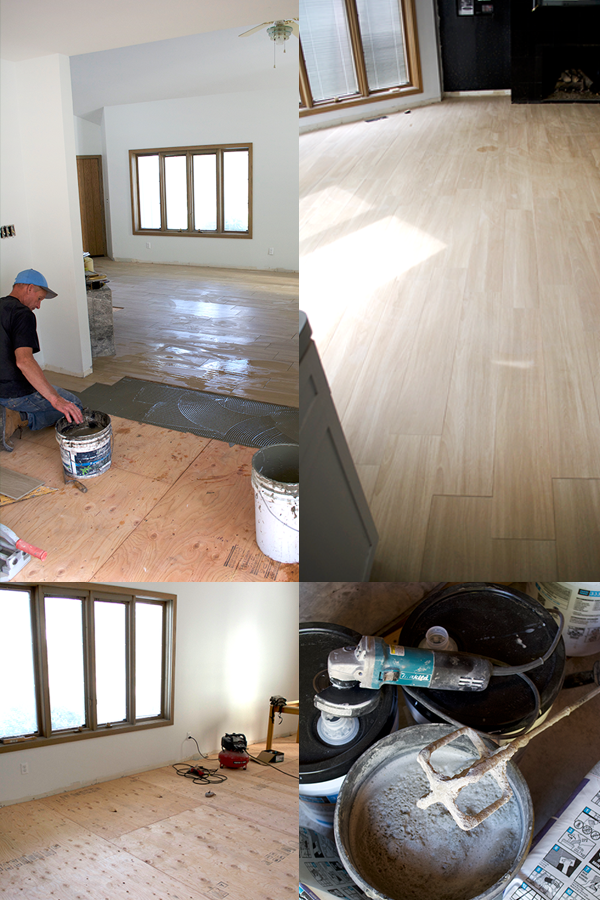
Then my FIL tiled the bottom to get a good base started and then he filled the gaps in the wall above it with more thin set. His go to product is Laticrete 272 with 333 adhesive mixed in. You can read more about that in our post on our wood look tile floors.
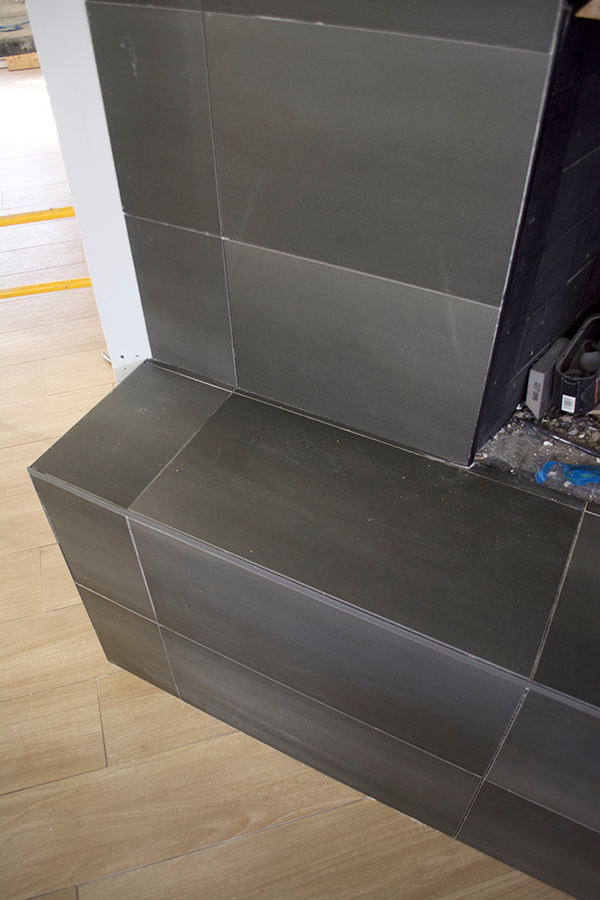
The tile we’re using is called Influence by Marazzi in the color Iron. We’re using the 12×24 pieces and decided to do it in a stacked pattern as opposed to a brick laid pattern and I LOVE it.
I was torn between going light or dark with the tile, but I’m so glad I decided to go dark. Marazzi has so many options to choose from and I know this is going to create such an amazing statement piece in the room.
For the corners of the fireplace, because the inside of the tiles are a lot lighter than the surface, we couldn’t butt the edges so we used metal strips that matched. These come in a variety of colors and you can pick what best matches your tile to have a nice clean edge.
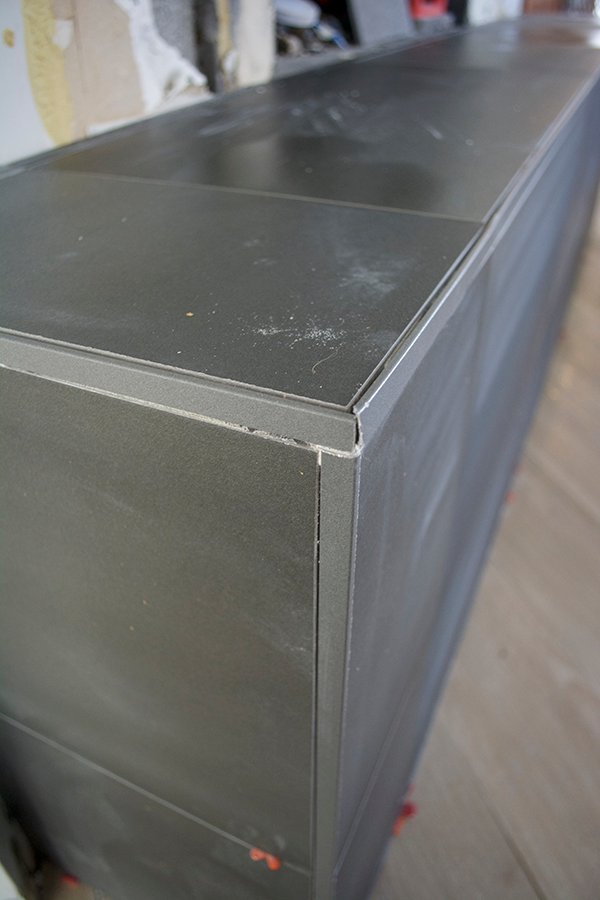
Then you just fill in the joints with grout like the rest of the tile. We’re using 1/8″ grout lines.
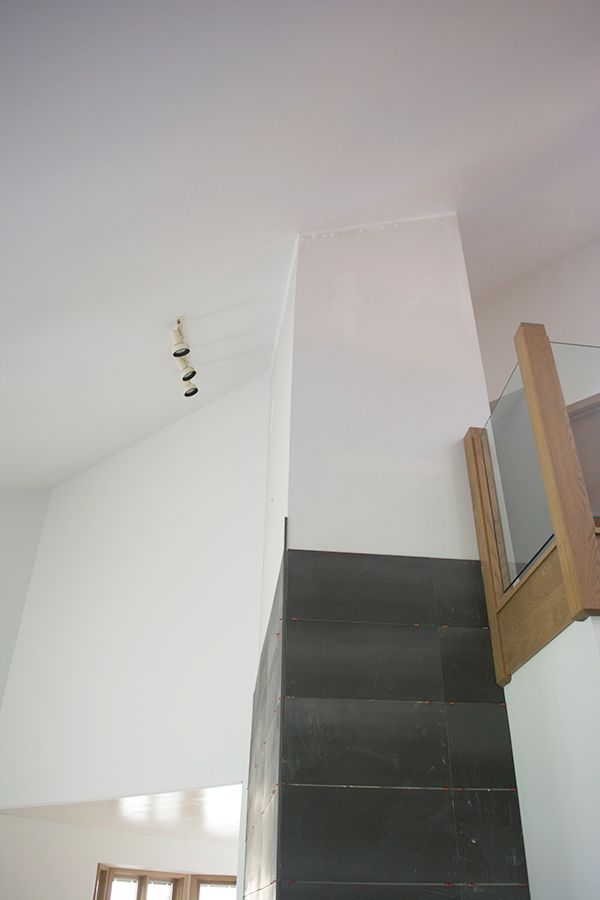
So this is the progress we’ve made so far! This is all without grout.
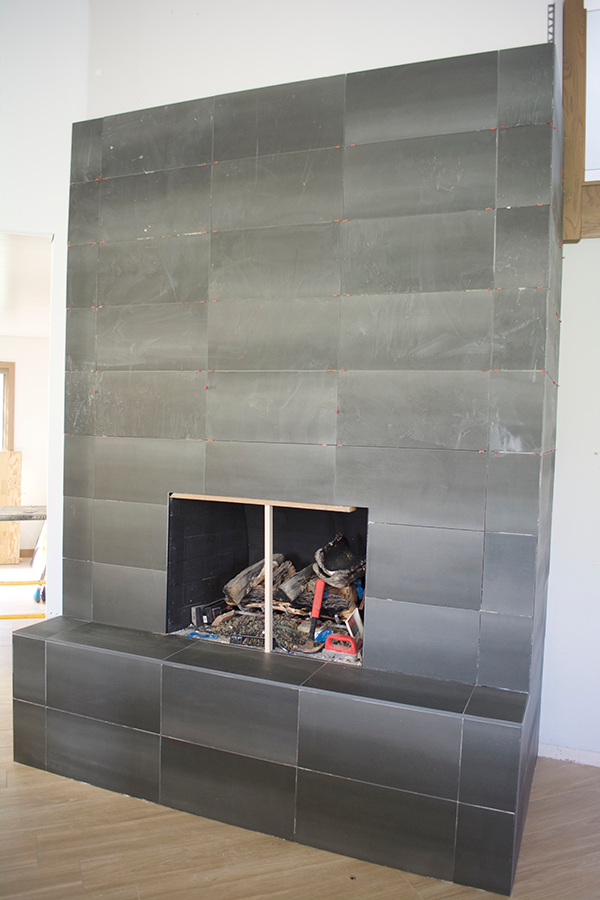
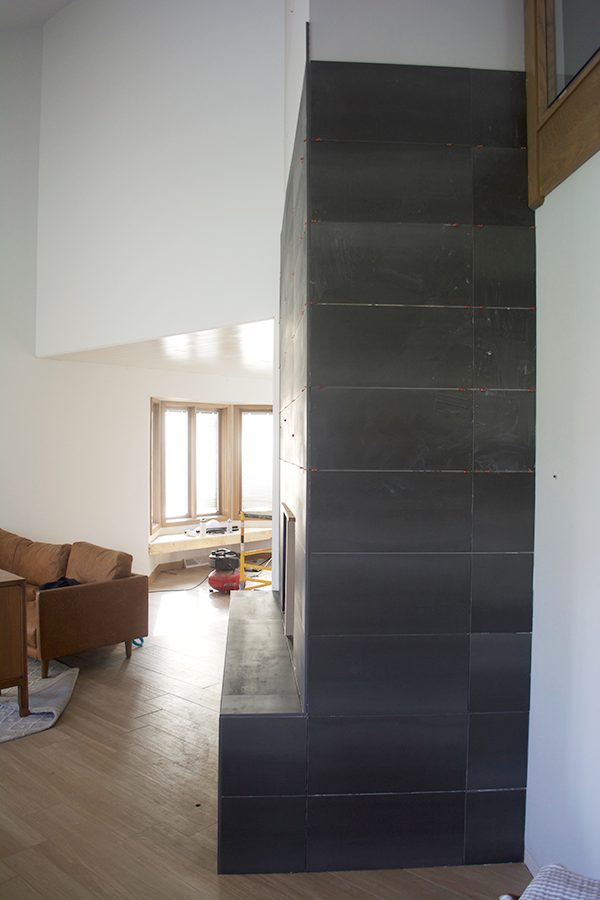
And we’ve got allllll the way up to the ceiling to go.
We’ll be using the grout color raven, which is a nice dark grey that should match pretty well. Once this is done then we have to decide what the do with the space to the right. We’re thinking some sort of shelving and definitely somewhere we can stack some fire wood. This is a wood/gas burning fireplace which we’ll probably mostly use as gas but I love the look of stacked wood.
Other progress we made this week included:
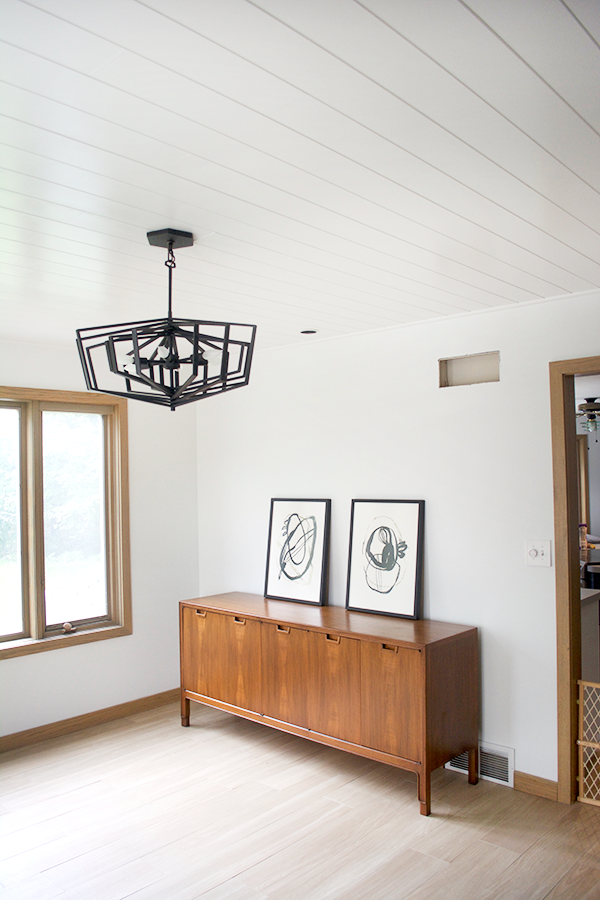
- Putting up our shiplap ceiling in the dining room (still need to patch seams and trim it out)
- Built the floating bench in the dining room (still need to paint it and make cushion)
- Filled cracks in table with wood filler and applied pre-stain (time to pick a stain!)
- TV entertainment center is almost done! (will need to stain it and finish putting together once delivered)
I’m feeling good with where we’re at right now but also stressing about what is left on our to do list! I’m trying to buy decor items here and there online and while I’m out shopping so I have stuff to play with when it’s time to decorate and I’m not running around last minute.
Make sure to follow along on instagram with all the behind the scenes action!
And check out the progress all the other featured designers have made this week!

This post is sponsored by Marazzi but all thought and opinions are 100% my own.


Libbie
This is just GORGEOUS!!!!!! Can’t wait for the reveal.
brepurposed
Thank you so much libbie!!
Nicole Varga | All the little details
I love the dark! It’s looking so good. I can’t wait to see how the whole space turns out!
brepurposed
Thank you Nicole!!
Andrea
Your FIL is foing a terrific job of the fireplace!
brepurposed
He’s amazing! I don’t know what we would do without him!
Deneen
Sooooo much better. Love the tile!
brepurposed
Thank you Deneen!
Jamie @ studio gaspo
It’s looking awesome! I’m so happy you went with the dark!
brepurposed
Thank you Jamie, me too!
Albertina || Mimosa Lane
This looks so great!! Congrats!! That is major progress!
brepurposed
Thanks Albertina!! We’re getting there!
Tee at Beauteeful Living
Lots of work but it’s looking great, Bre! Looking forward to seeing how this space transforms!
brepurposed
Thank you so much!!
Valerie Hill
Wow! What a difference it makes bringing the tile up the wall beyond the mantel level! Looking forward to the progress!
brepurposed
It creates such a statement! I love it!
Kayla AKA Kilo Bravo
Loooove that stacked tile and especially the use of the metal strips for the edges. We used those a lot in the bathrooms of our last house, and it is such a clean, minimal, modern look. I feel they often get overlooked because they are so cheap to purchase, but it’s such a great alternative. Can’t wait to see the progress next week!
brepurposed
Yes! They are such a game changer and create such a nice, streamlined look!
Jessica | House Homemade
It’s looking so good! Fun to watch
brepurposed
Thank you Jessica!