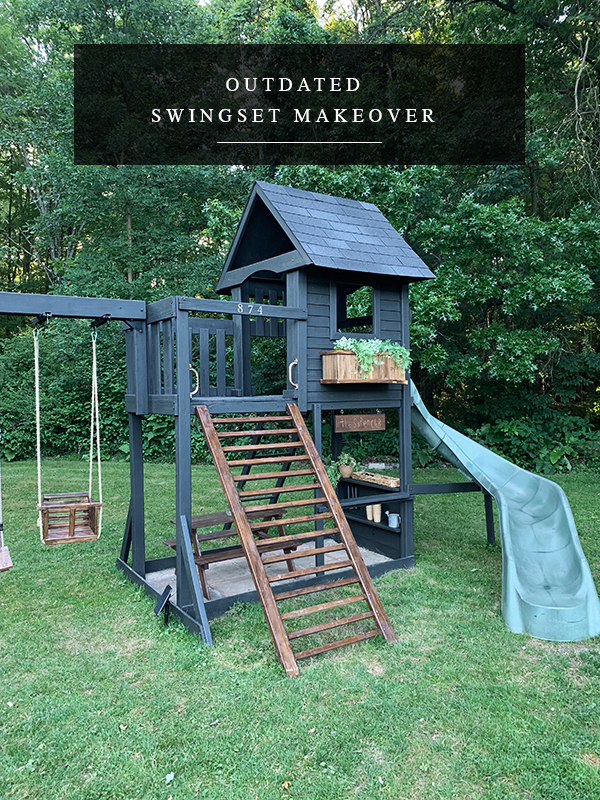
Today I am so excited to share with you the full swing set transformation that you may have seen bits and pieces of over on my Instagram. I had been looking for a swing set for the kids for a little while but quickly moved my search to Facebook Marketplace when I realized how crazy expensice they can be. Then I remembered one of our babysitters had one they were more than willing to part ways with. It just needed a little bit of repairs, which was perfectly fine for us and meant we had a new project to work on 😉
Our Swing Set Transformation
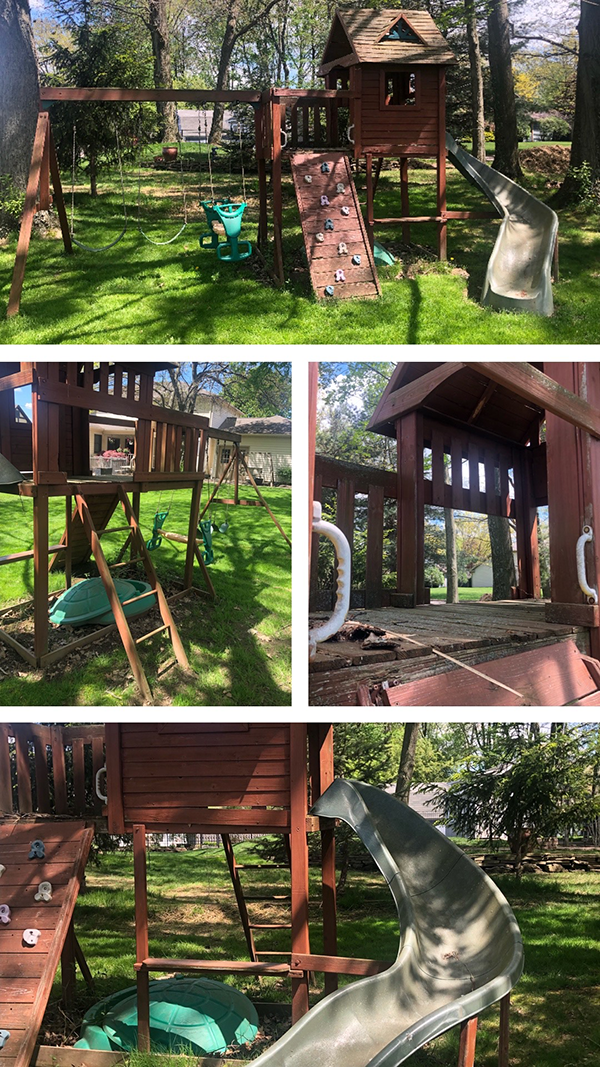
BEFORE PHOTOS
Structurally it was still in pretty decent shape. We only had to replace a few rotted boards!
REPAIR THE ROOF
The original roof had seen better days and was covered in moss-type growth. We started by taking all of the old shingles off and adding new plywood. I laid down roofing felt to protect from any moisture and leaks. A tip I have for laying down the felt is to leave a 4-6 in. seam overlap with the flaps opened downward for the rain to wash down the sides so it doesn’t pile up under the seams. Instead of using nails, I used a fun new tool called a Hammer Tack! This uses staples instead of nails, that way it protects kids hands from being hurt from any nails penetrating the wood. Make sure to give the tool a hard smack to make sure that staples lay flat!
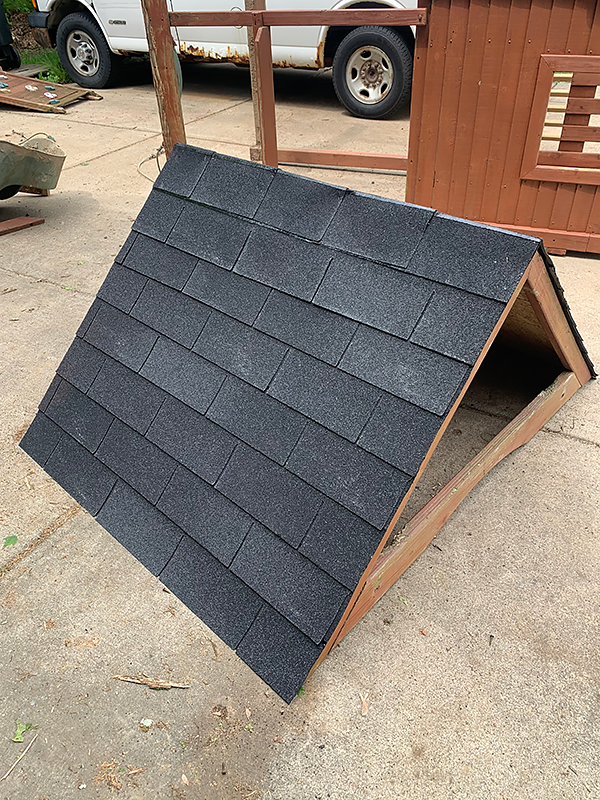
When installing shingles, always start from the bottom up. I used an offset brick pattern. And instead of using a sealer or specific product to finish the peak of the roof, I used spare pieces and cut them to fit and overlap where needed. Lastly, I marked the edges that needed to be cut with chalk and trimmed them to even them out.
PAINTING AND STAINING
I prepped the swing set by power washing the whole thing to get all of the dirt and dust off. While the roof was still off, I painted it the same color as our house, which is Sherwin Williams SuperPaint that was color matched to Benjamin Moore Blacktop.
Then I moved onto the rest of the swing set. If you thought it’d be easier to spray it, you’d be right. But I really love being able to get into all of the nooks and crannies with a brush. I painted most of it with one coat and then went back through and touched up some areas after it dried.
I wanted to give it some wood accents so I stained the ladder a dark wood color using Varathane Dark Walnut Gel Stain. And then I added brass accents by spray painting the handles.
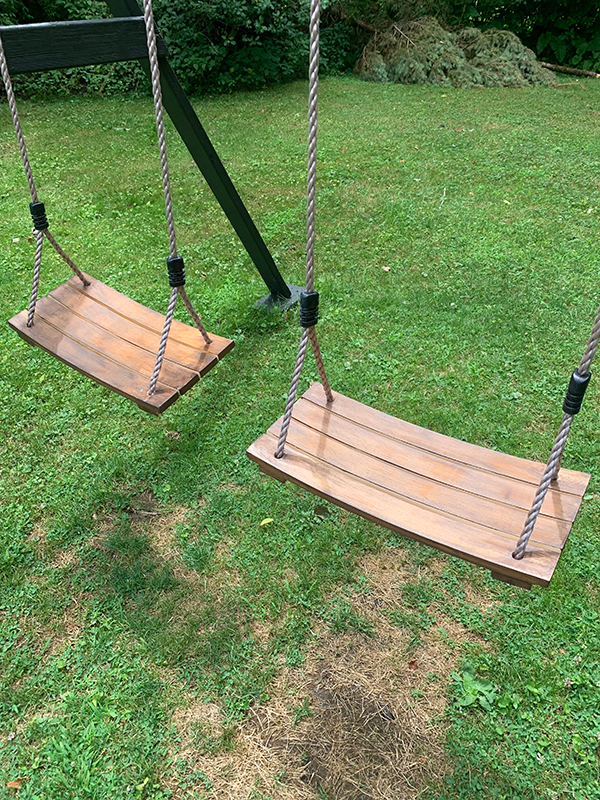
NEW WOOD SWINGS
Let’s start with the baby swing that we made out of $10 worth of stakes! So many of the baby swings I was looking for were so expensive. I wanted it to be durable, functional, but also look good. So we built our own and you can watch the whole process of our baby swing tutorial on my Instagram.

The big kid swings are from Amazon. I will be honest, the reviews on these were mixed. But I ended up going with them because the main negative feedback was that the finish wears off quickly and I had a feeling I was going to stain them anyways. The kids had mixed reviews as well when we got them. They were a tad slippery, but once they were on them they seemed to have fun. But the finish did start to wear off quite quickly so keep that in mind if you’re planning to order them. To refinish them I sanded them down and stained them using Varathane Dark Walnut Gel Stain and sealed them with Spar Urethane.
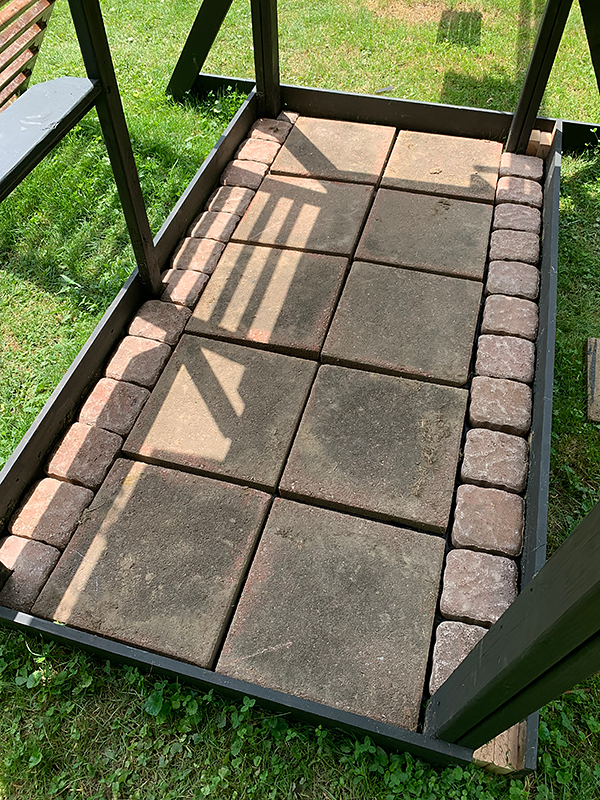
PAVERS + POLYMERIC SAND
Instead of doing the typical sandbox area underneath, which I knew would become an instant disaster and mess, I decided to make a little seating area out of left over pavers we had in our yard.
I laid the large square pavers (which had been sitting in our yard for years) in two rows in the center and created a border with smaller squares around the sides.
Then I poured Polymeric Sand by Techniseal in the cracks and joints between the pavers and swept it to make it even. The excess was blown off with a leaf blower. To solidify the sand, you’ll use water. I added water to the sand and paver area in intervals. So I did 30 seconds of watering followed by a few second of no water and repeated that. Then I took my leaf blower and spread the water around to the sides and corners so it could soak in evenly and wouldn’t leave a haze on the pavers. Then you let it dry! Once it’s dry it should become rock solid!
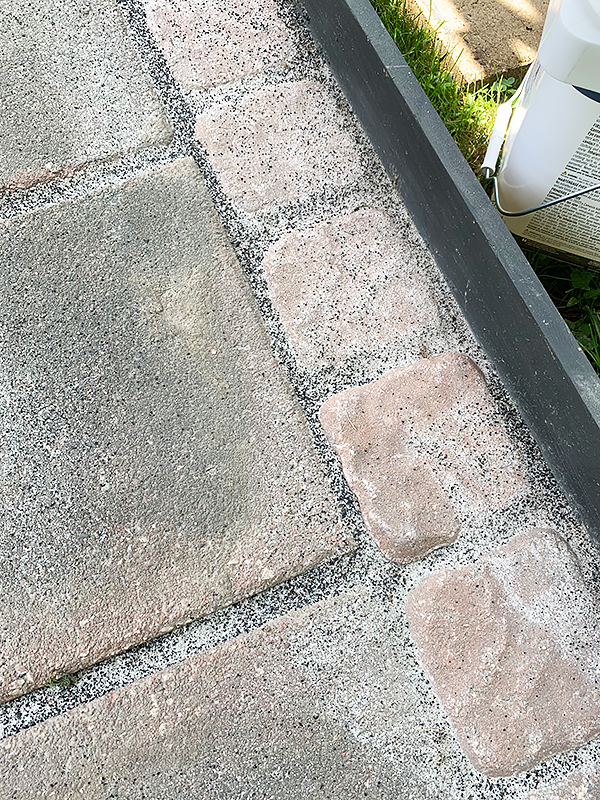
Side note: There were black specks in the sand I had which were unexpected, but the final look with the specks was okay because it was just for the swing set & outside.
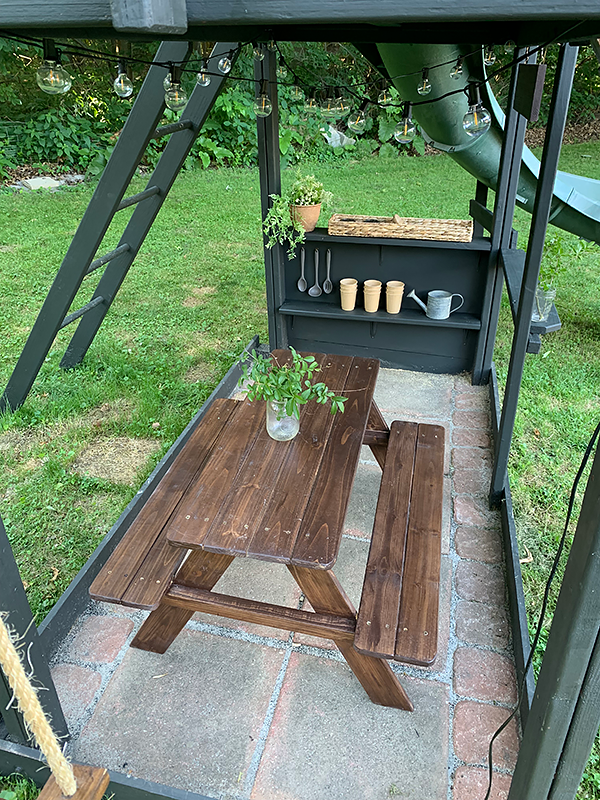
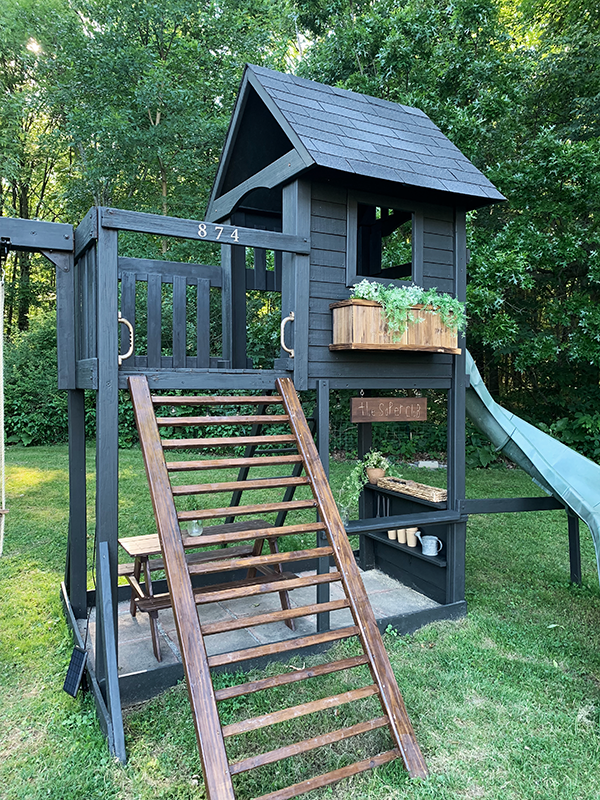
PICNIC TABLE
I got a mini kids picnic table to put under the swing set and it fit perfectly. I ended up staining it the same color as the swings and ladder, which turned out great. Then once it dried I put it on the pavers and it was ready for use!
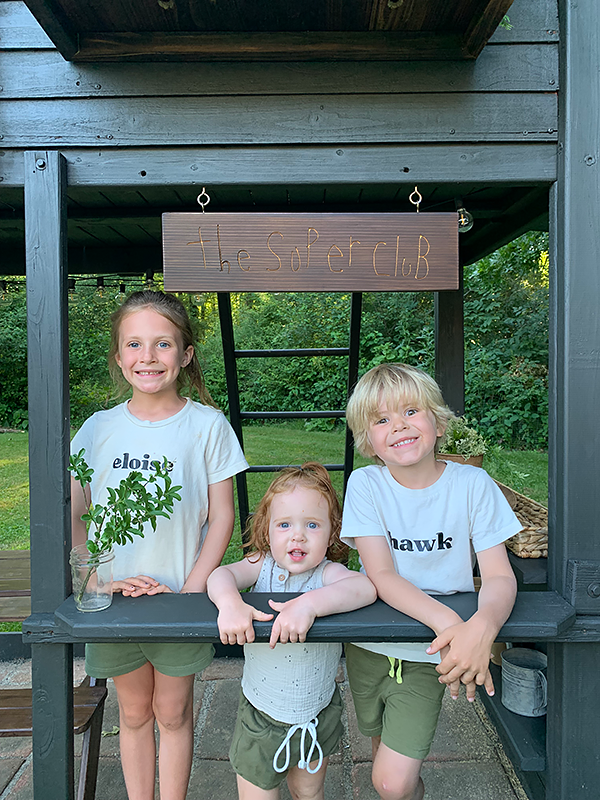
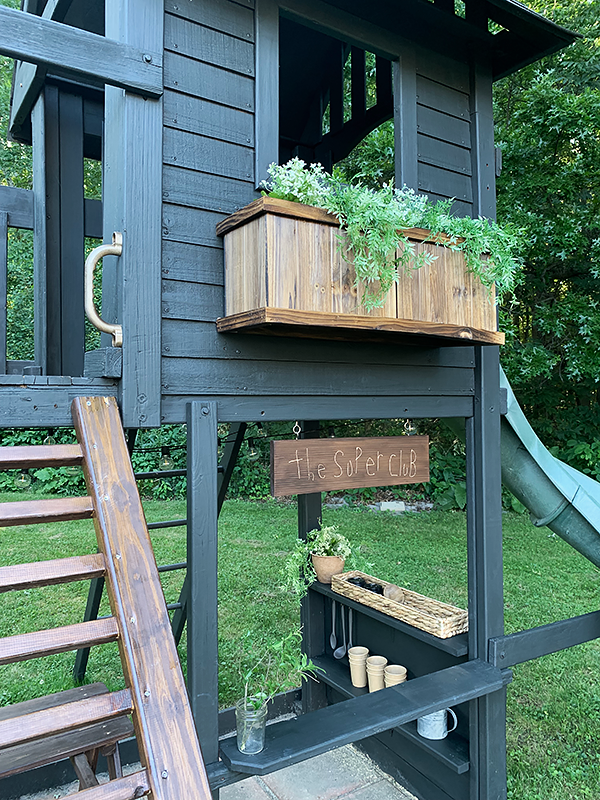
CUSTOM SIGN
Originally the idea was to take the sign to the library and use their GlowForge to engrave it. Unfortunately it was down. So I reached out to a local company Zappia Wood Creations and they engraved it for me. The best part about it is that I used Eloise’s handwriting. I had her write “The Super Club,” then I entered it into the computer and made a font out of it. So it’s even more special now!
FINISHING TOUCHES
I knew I wanted to add a wooden flower box under the window, and originally I was going to build one, but I happened to find the perfect one at Lowe’s. Once it was screwed into place, I added faux flowers and greenery from Michael’s.
By the picnic table, Dan built a wall with two little shelves that I painted the same color. These are for playthings, like the cups I bought them, to sit on.
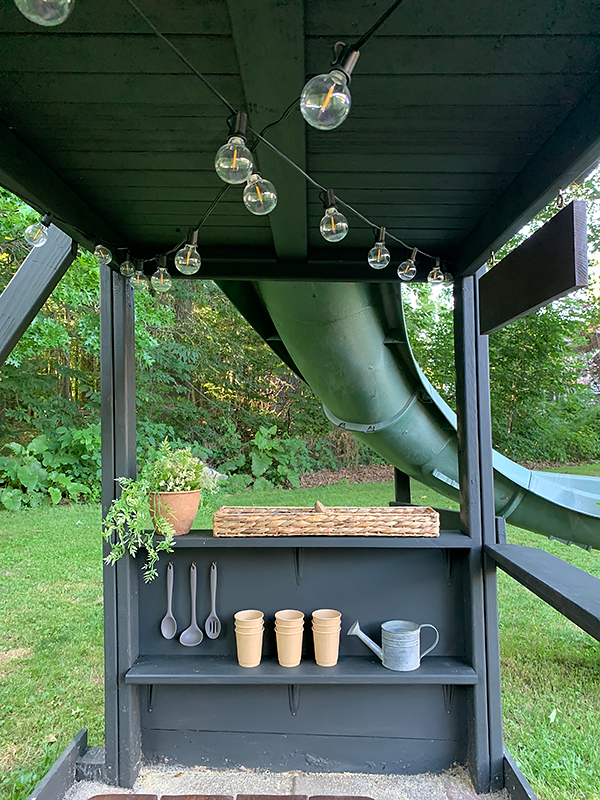
I hung solar string lights from underneath where the pavers and picnic table sit. That way they have a little light when it gets darker out. Plus I just think it adds such a cute touch.
I know these are all “small details” but they are not only things that make me happy, they’re things I know will make the kids happy. I’m all about details, so why not spend a little extra time to make something extra special!
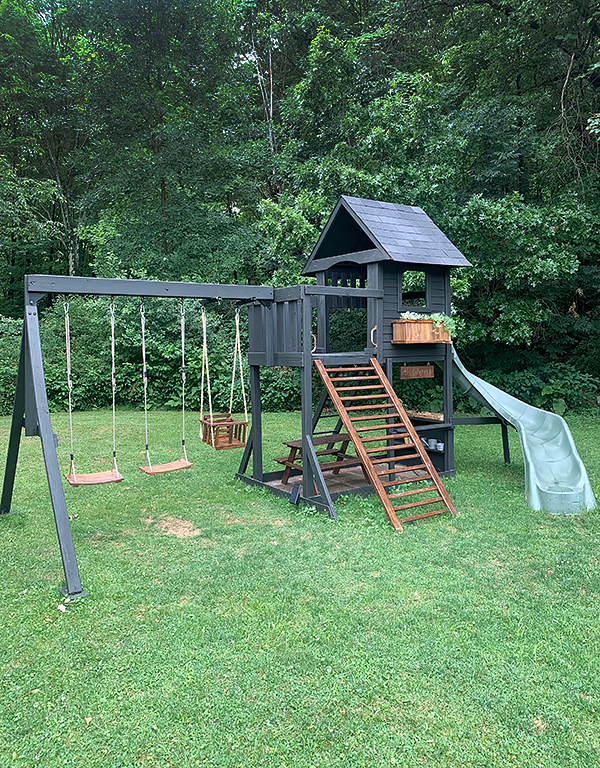
The Super Club is open and ready for business and this swing set transformation is complete! It’s already so loved by the kids! It’s such a special little place for them to hang out for years to come. I know it may need touch ups eventually here and there, but it is so worth it to give a project your all and put everything into it, especially if you know it’ll be a part of so many memories.


Debbie
What a darling transformation! I love everything about it. I, too, love the details. I believe the details make a project “spectacular”. The details provide layers of depth which draw you in. It makes it special. Congratulations on a job well done!!!